🪴 #1 | Monitoring Mint with Microcontrollers running TinyGo
If you’ll listen to the latest Cup o’ Go’s episode, we were talking about TinyGo, and this happened:
Shay Nehmad: 18:59
I really love the idea of, like, getting to work with Tiny Go on a thing. But I’ve never gotten into, like, actually getting a chip and, like, soldering it and whatever.
Jonathan (my co-host) was very encouraging:
Jonathan Hall: 19:46
It’s good that you asked that because one of the big features of this release of TinyGo is more ESP32 support. […] we’ll have Ron talk about this next week.
I was worried about cost, but Jonathan assuaged my fears:
Jonathan Hall: 20:07
As far as the cheapest way, I think just buy an ESP 32, which is about $5 […] They’re super, super cheap.

But anyways. Surprising even myself, I actually followed through with it, and got the stuff. Let’s get building!
Plan
PRD: What are we building?
I have a mint plant outside. It’s great for tea and shakes. But I never know when to water it.
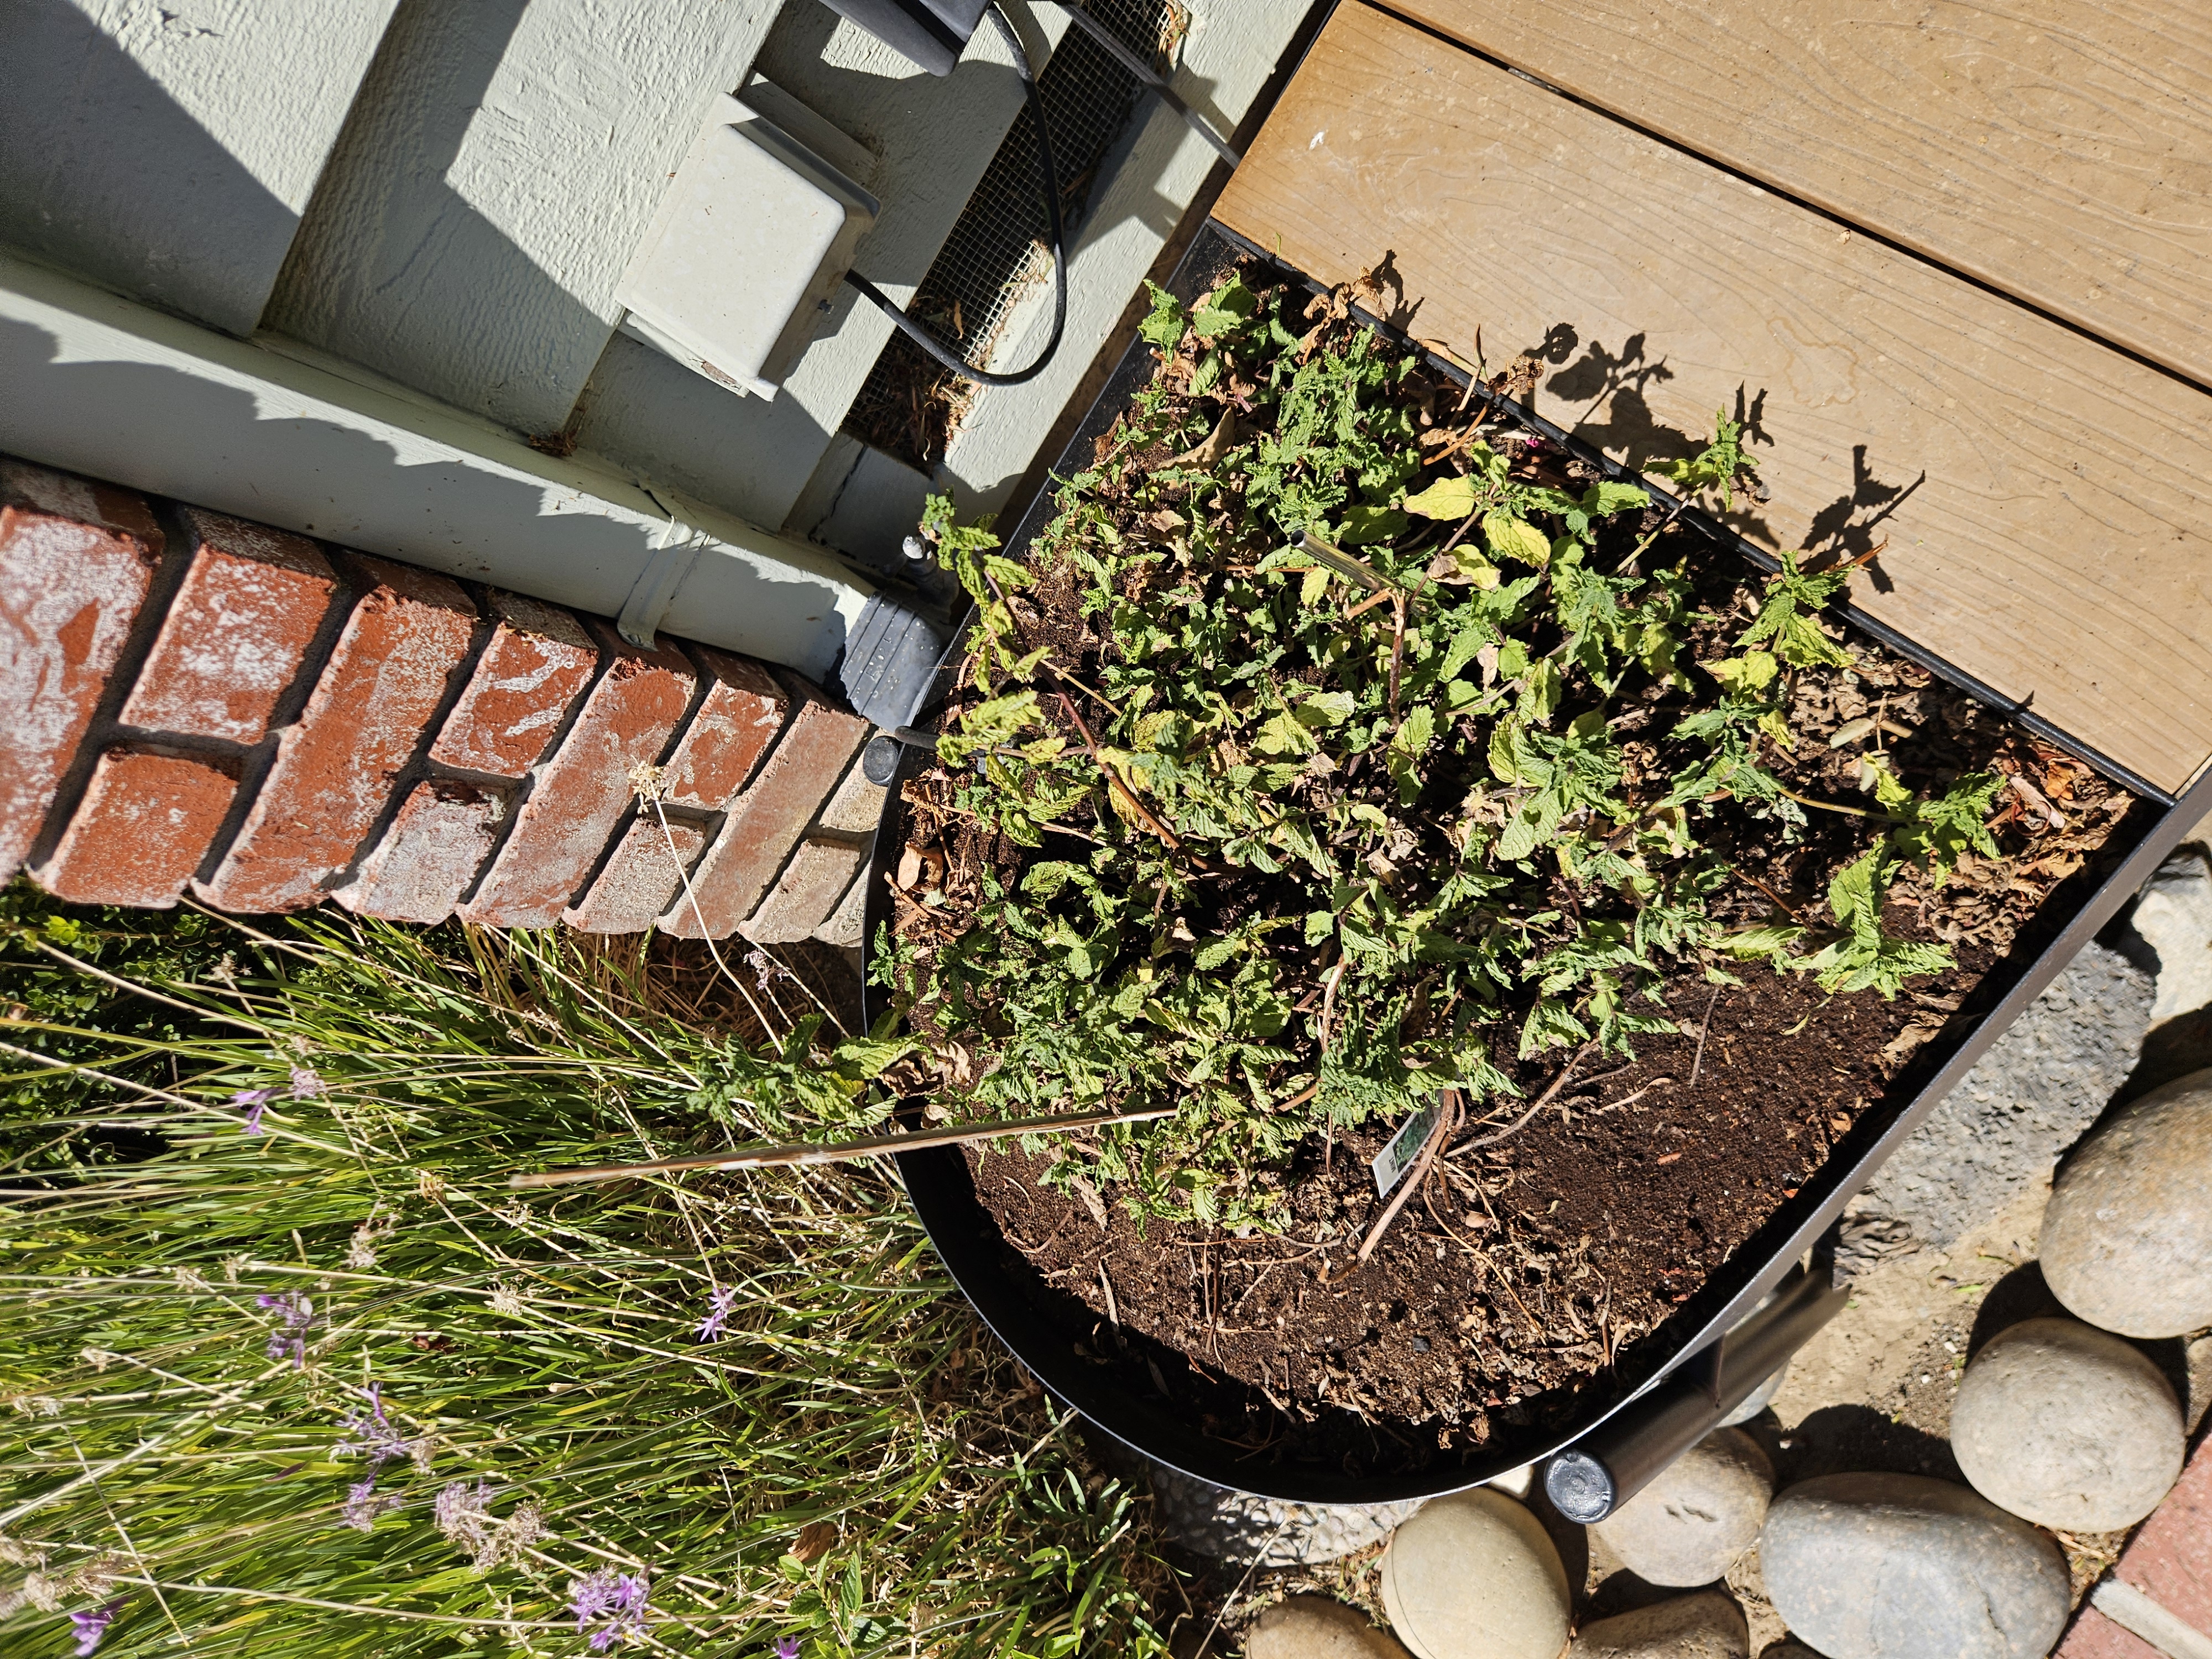
I just randomly throw the water I used to wash rice into the soil. Or sometimes dump out the espresso machine tray on it. It’s still alive, so evidently, it’s fine. But getting a daily notification of the soil moisture level seemed like a modest first project and a nice improvement. I’ll actually water it even on weeks where I didn’t cook rice!
How will we build it?
So… I’m not sure! Usually if this was software I would be able to outline how it works. But this is my first DIY electronics project in a LONG time (since… 6th grade electronics class). Since this is the first time I’ve done this, I’m documenting EVERYTHING. In “What we tell AI?” fashion, instead of a friend or a local maker community, I just talked with ChatGPT 5.6 Sol High to help me out. After a bit of clanker advice, I landed on:
  flowchart TD
    A[Wake] --> B[Power moisture sensor]
    B --> C[Wait 100 ms]
    C --> D[ADC measurement]
    D --> E{Soil dry?}

    E -->|Yes| F[Connect Wi-Fi]
    F --> G[Send: I'm thirsty]

    E -->|No| H[Connect Wi-Fi]
    H --> I[Send: I'm good]

    G -.-> R[HTTP -> HTTP/S Relay]
    I -.-> R
    R -.-> T[Telegram bot]
    T -.-> PG[Telegram Group]

    G --> J[Turn sensor off]
    I --> J
    J --> K[Deep sleep 1 to 6 hours]
    K --> A
The brain will be an ESP32 microcontroller, and we’ll hook it up to a sensor and some power. I went with batteries because I have some rechargeable ones lying around to power my XBox controller.
I then planned the phases so I could iterate and test along the way, with the main milestones (spoiler; checks are what I’ve finished for this blog):
- 1. Inventory: Get all the things.
- 2. Hello world: Flash some TinyGo code on the microcontroller.
- 3. Get Wi-Fi working, then send a notification sent from the microcontroller somewhere.
- 4. Solder the headers.
- 5. Connect the sensor.
- 6. Read raw moisture values.
- 7. Process the values and send a notification when the soil is dry.
- 8. Make it all work together and run some tests.
- 9. Move to battery power instead of USB power.
Let’s do it!
1. Inventory – getting the mise en place
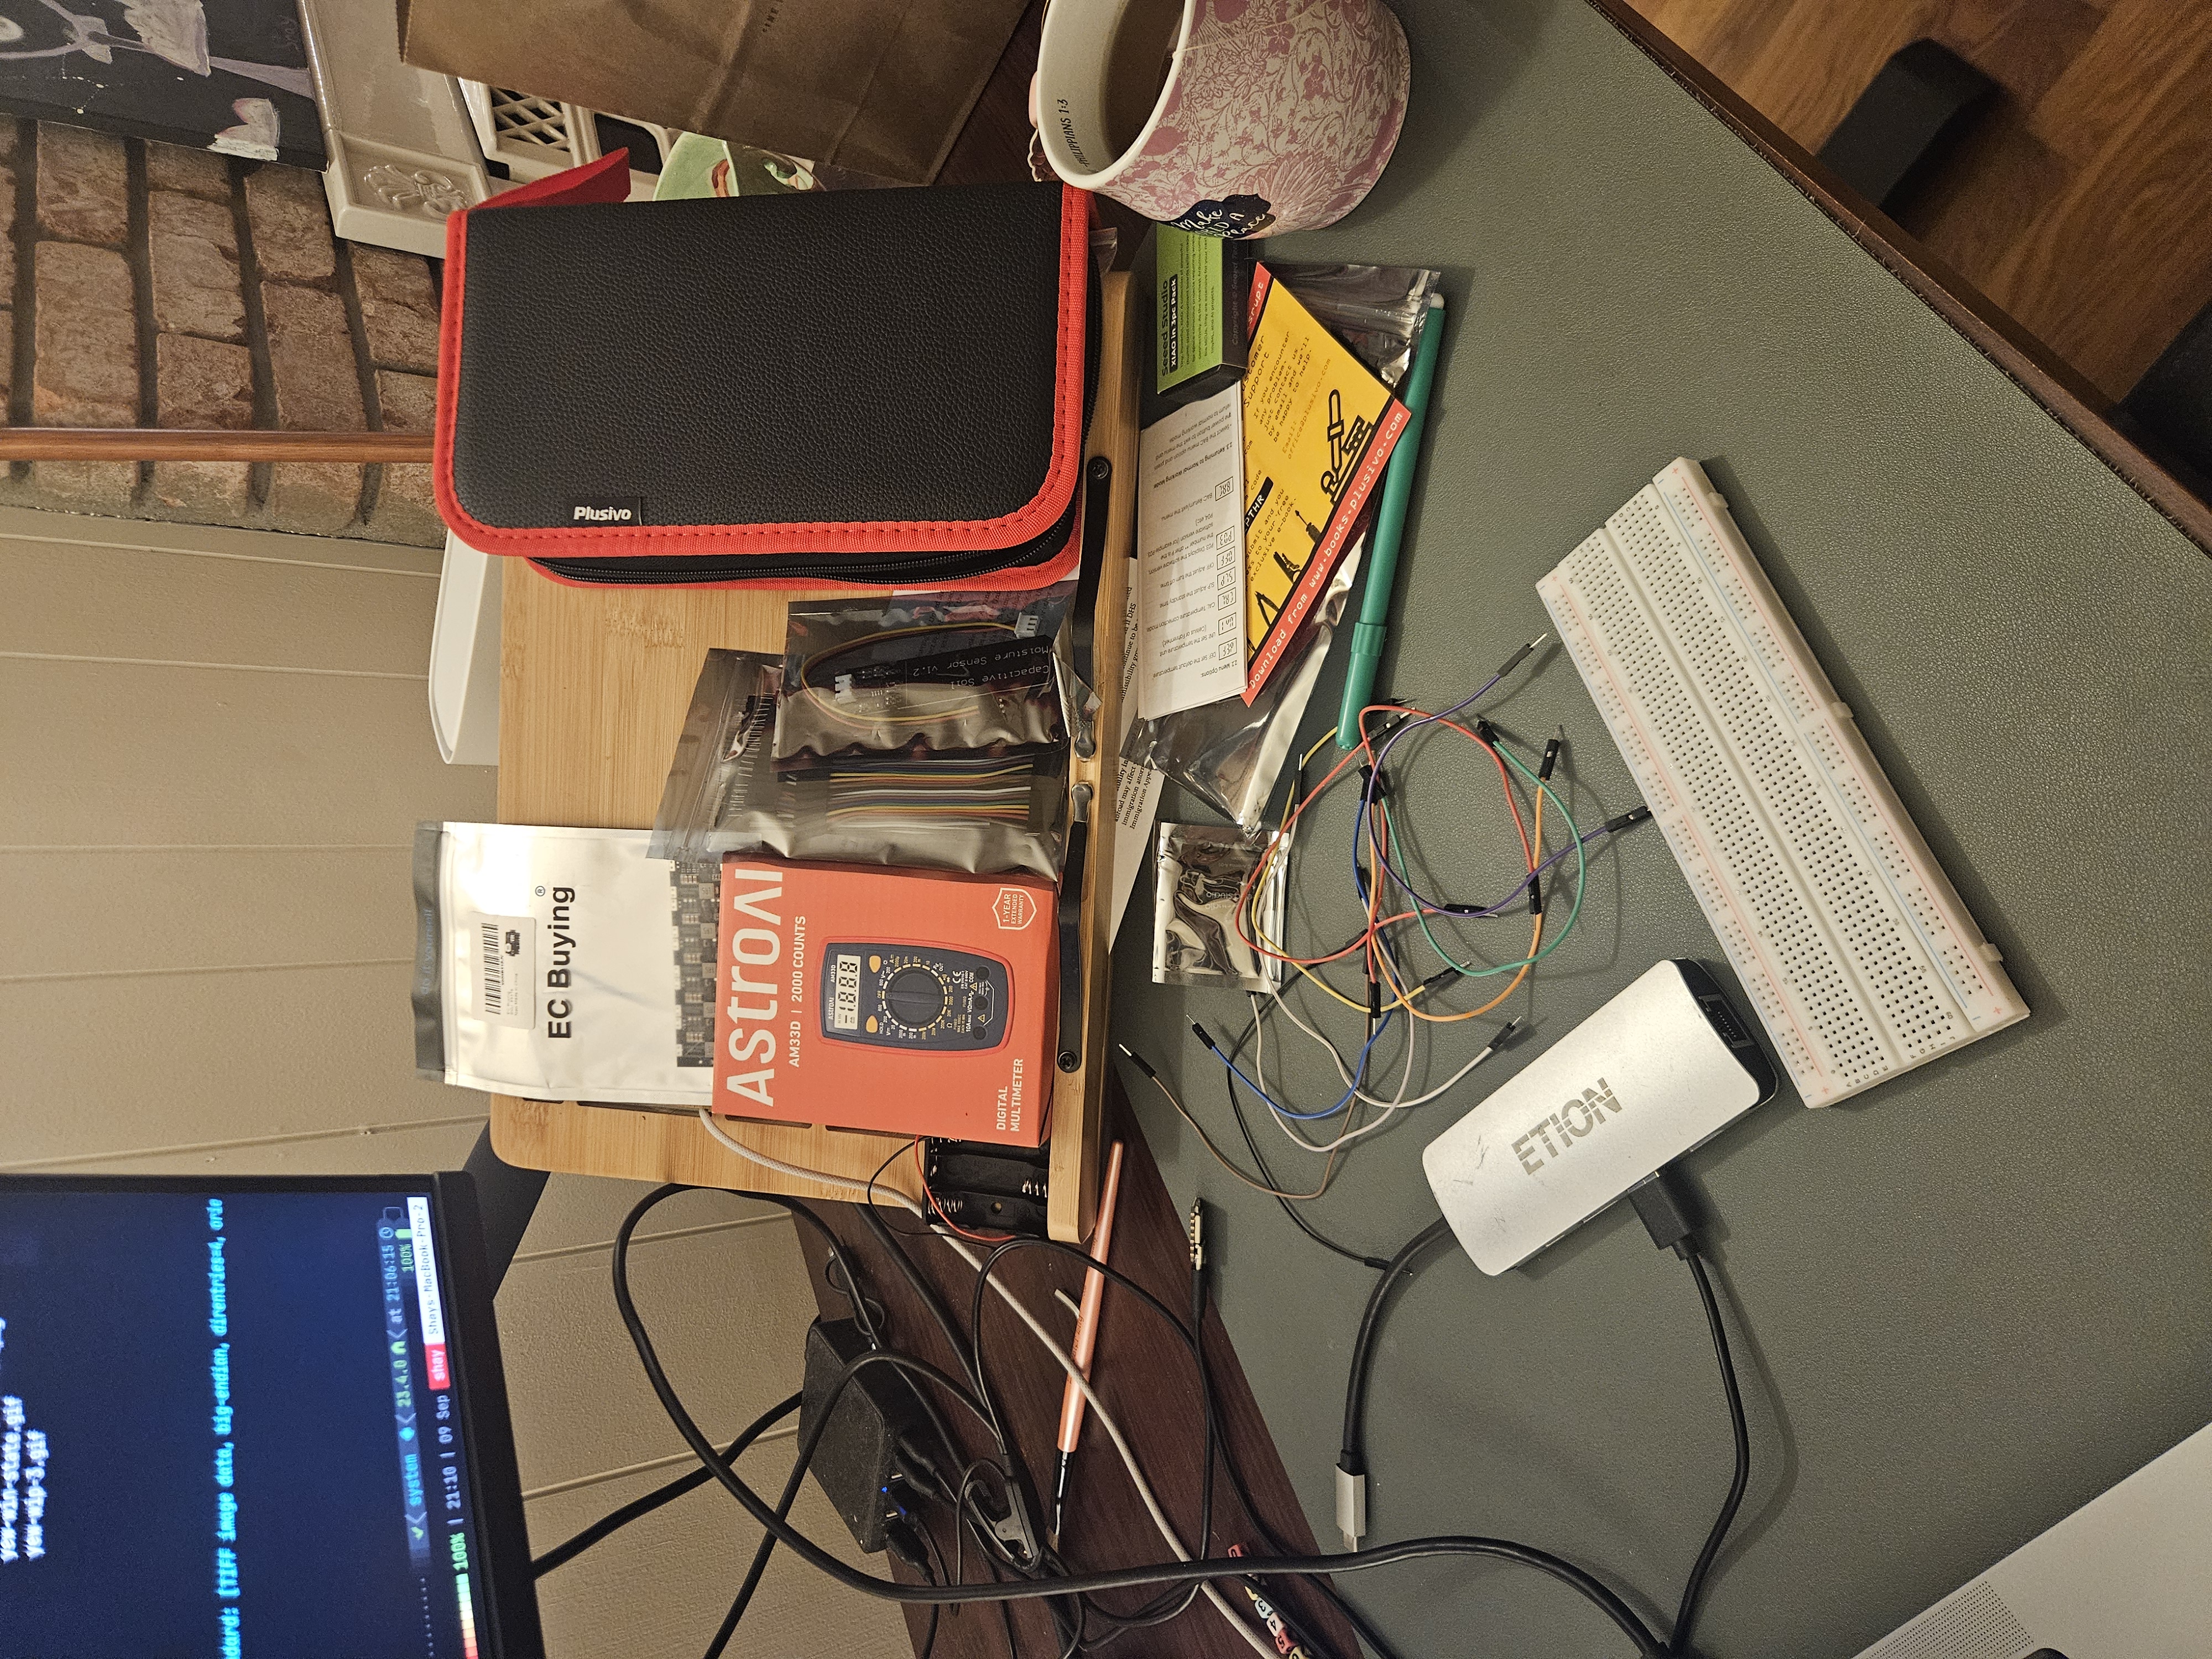
I got the most beginner-friendly and cheap stuff I could buy. Here’s what I got if you want to replicate/follow along:
- XIAO ESP32-C3 from Seeed Studio. I got it because it’s dirt cheap, and it’s on the TinyGo “Featured Boards” documentation page.
- California JOS 1 PCS Breadboard.
- Soldering Iron Kit from Plusivo. Why didn’t you get the pre-soldered chip? Because soldering seems awesome, I did it in electronics class when I was a kid.
- Stemedu Soil Moisture Sensor.
- Power: Battery case (3 double-AA), a XL63020-3.3 Boost buck.
- AstroAI Multimeter.
- Buncha wires and batteries.
Since many of these come in packs of 5 or whatever first thing I did was Mise en Place; put all the things on the table so I can get to work and put the spares away.
What do I wish I got, but didn’t?
- An LED or a screen. It would have been really nice for visual feedback. I thought that all these microcontrollers had a built-in LED, but the XIAO ESP32-C3 doesn’t have one.
2. Hello world
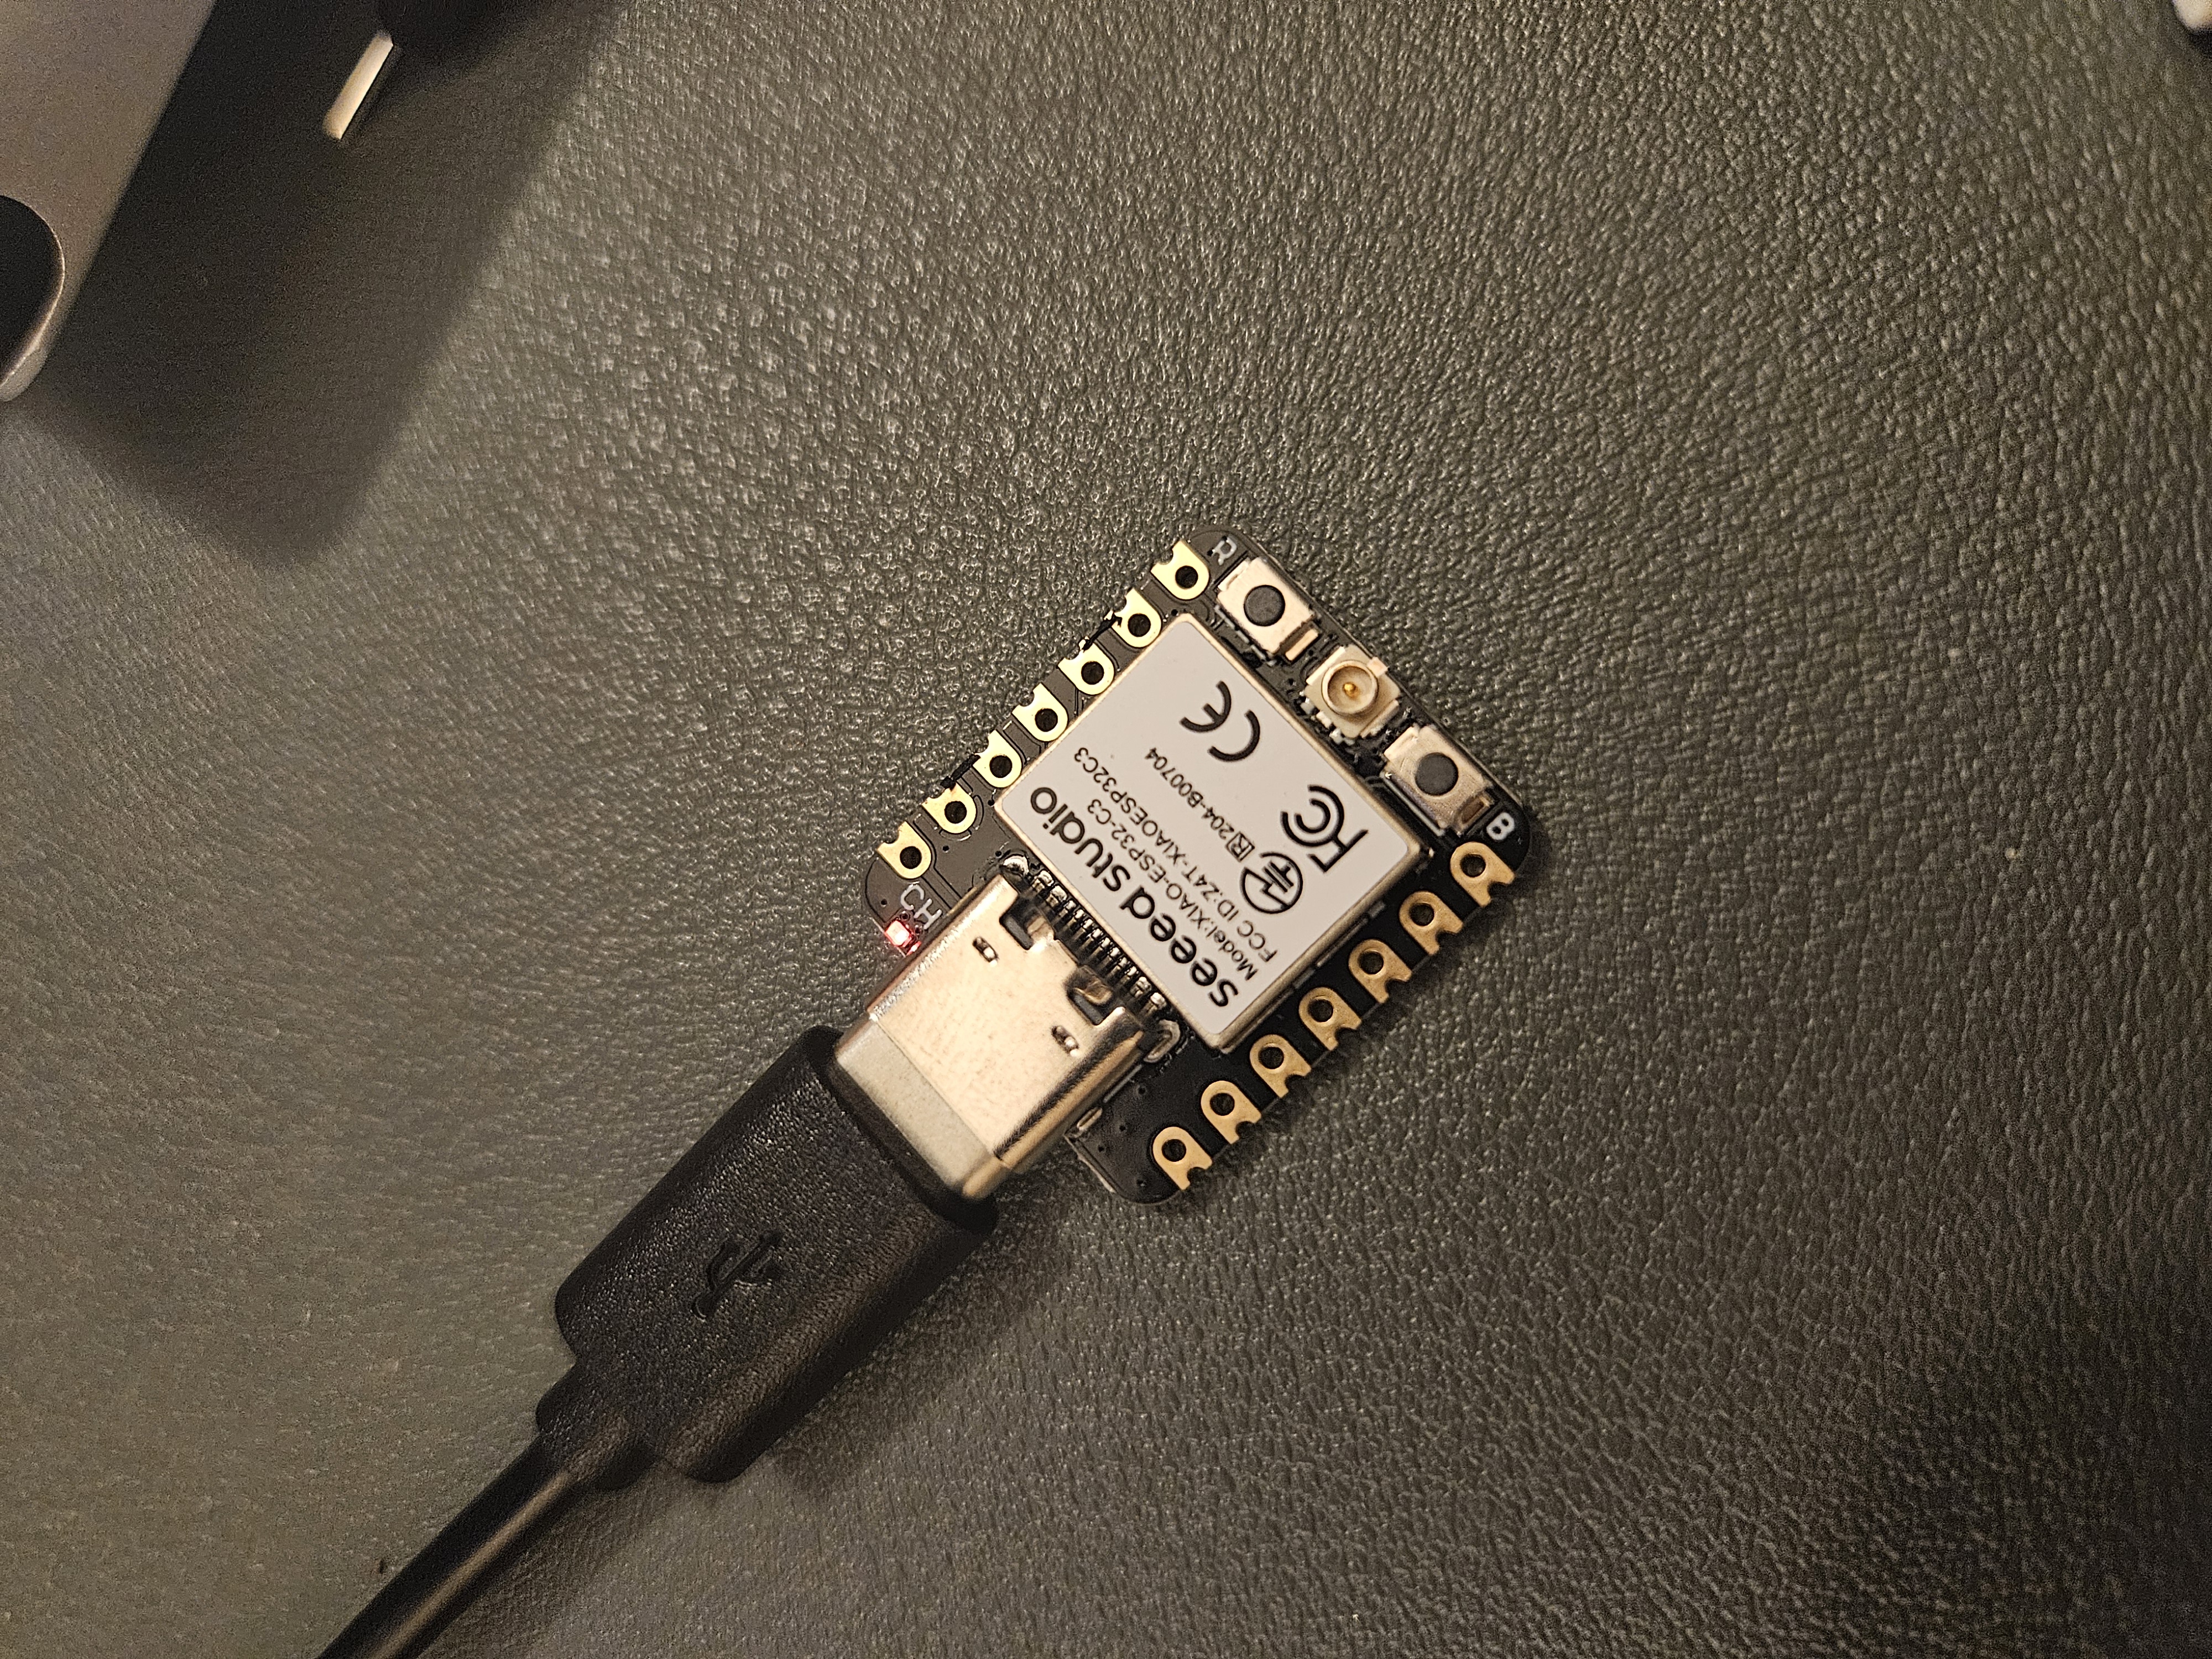
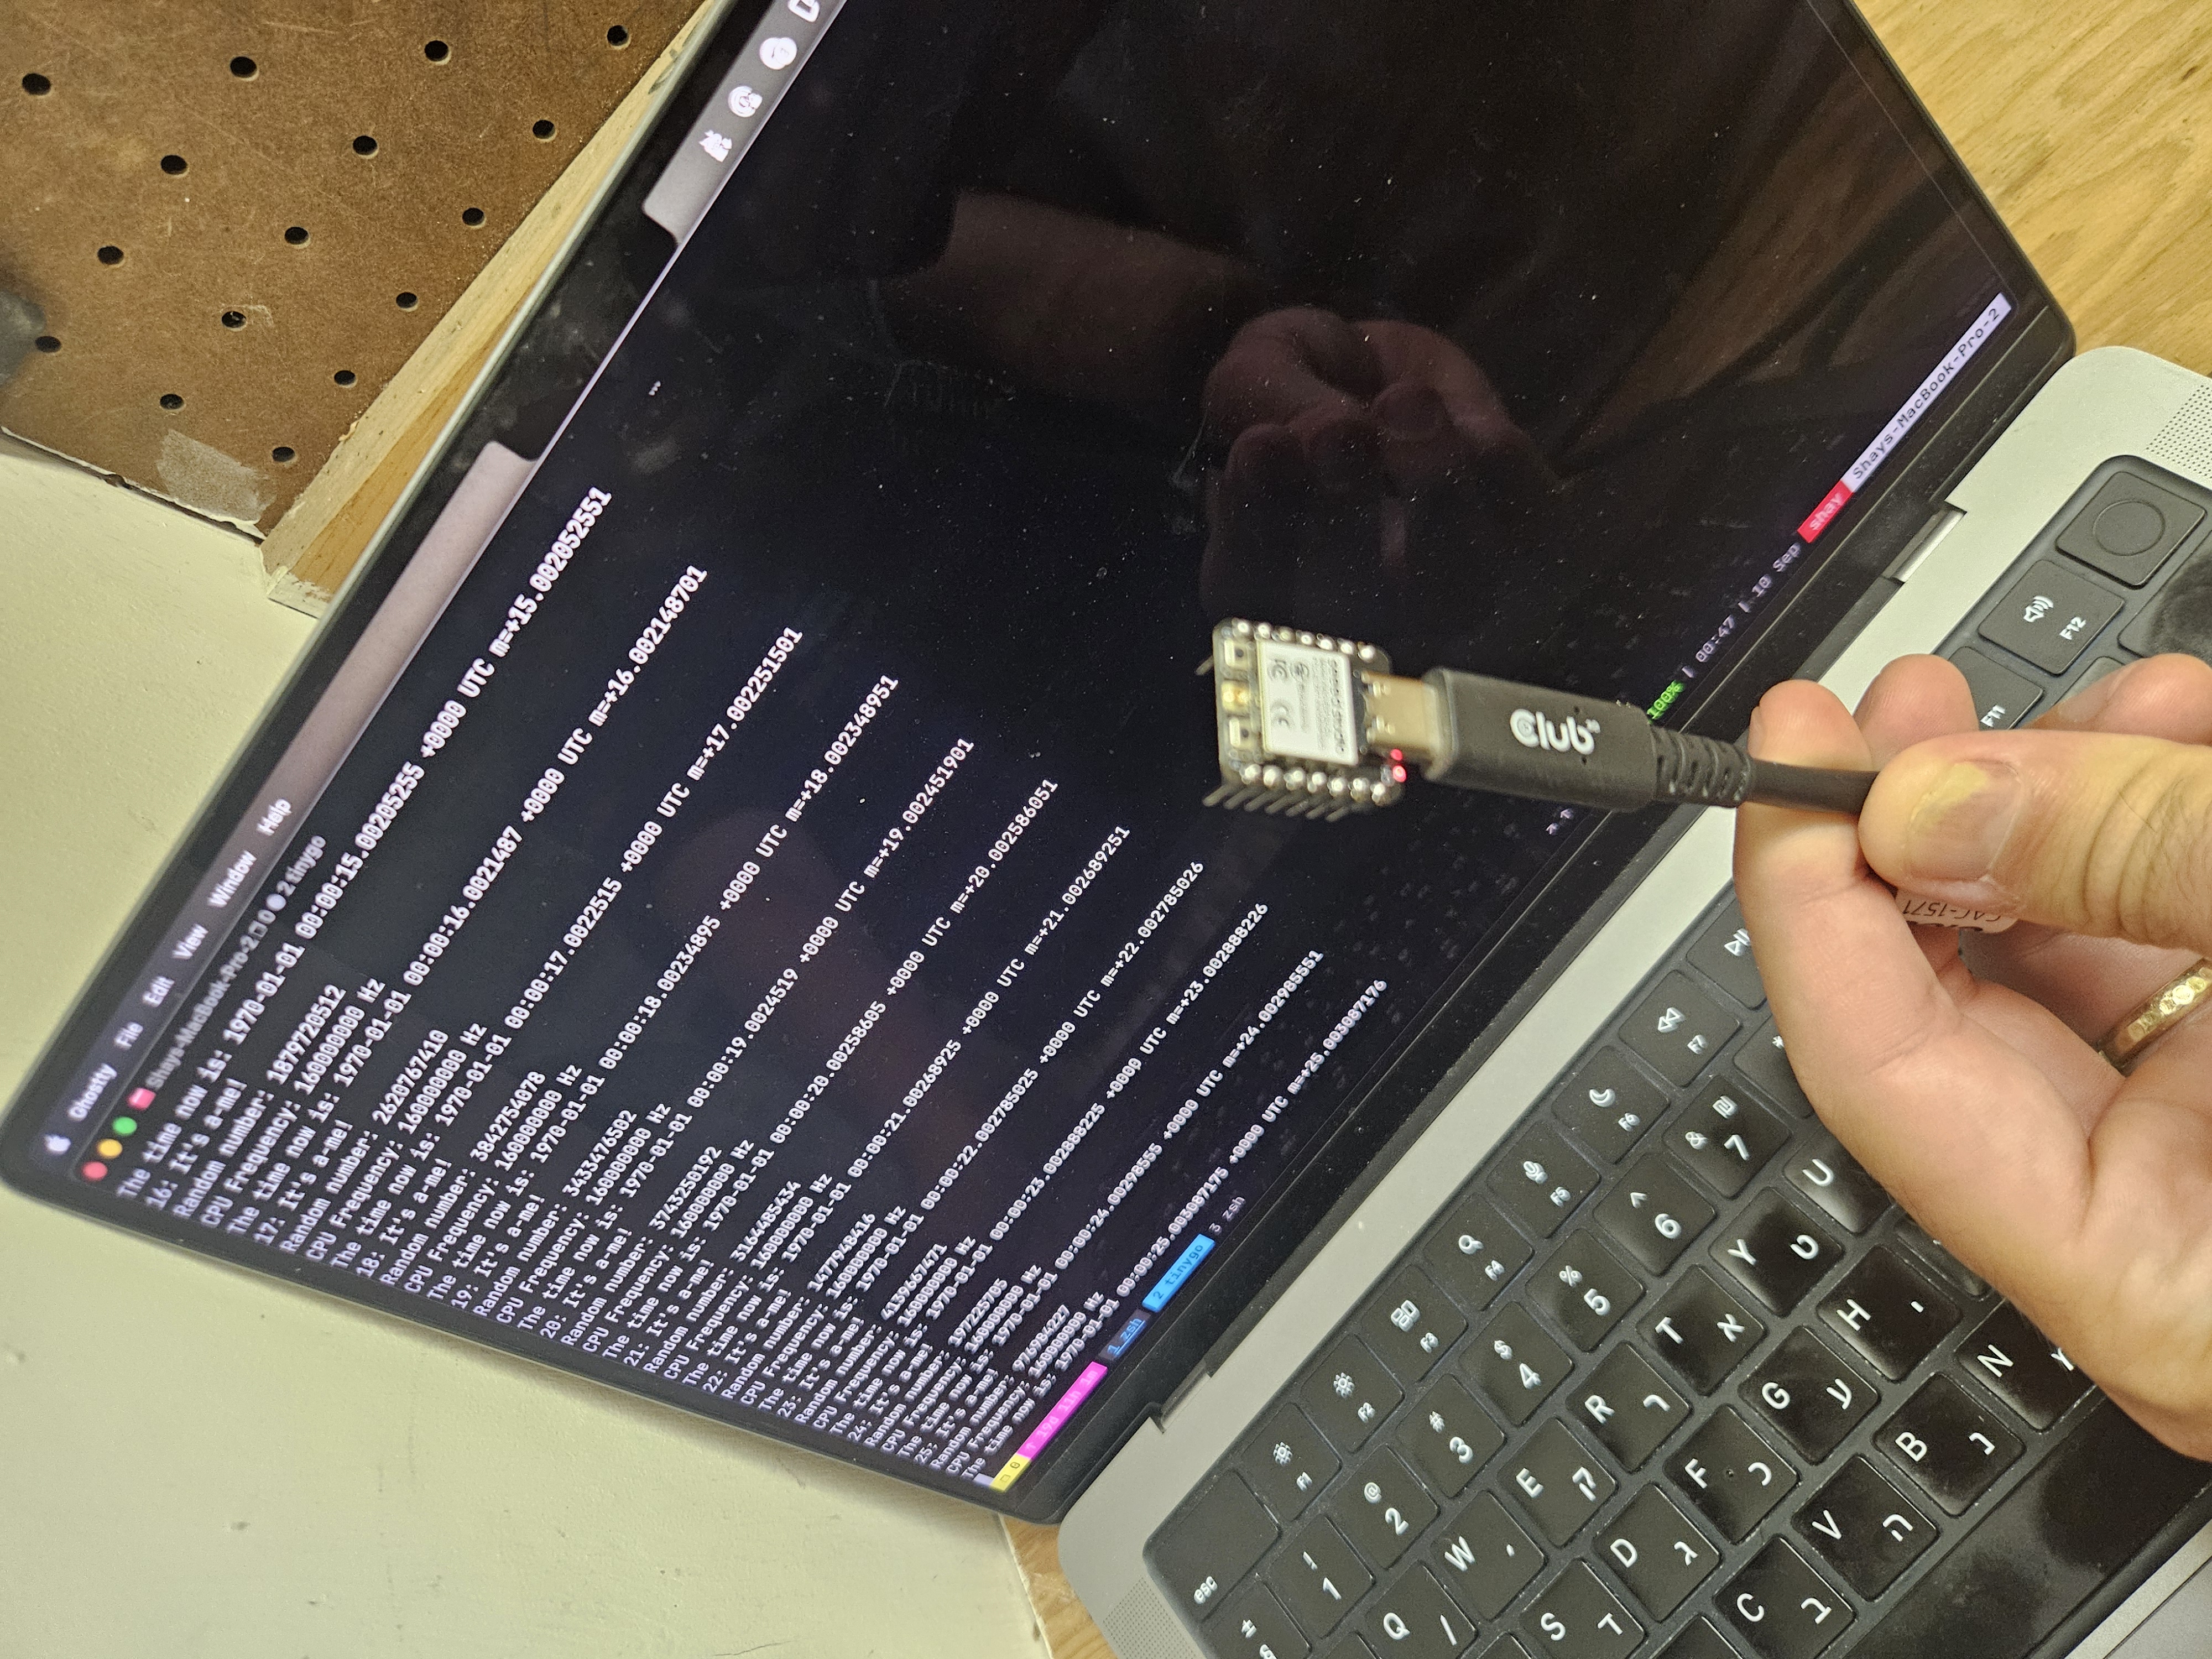
Let’s make this computer compute something. Connected the microcontroller to the laptop. A little red light came on. Usually red light means stop but I’ll ignore that:
Installing TinyGo was simple enough. There was an error since brew requires trusting a tap now, so opened a PR to update the docs.
❯ go version
go version go1.27.1 darwin/arm64
❯ tinygo version
tinygo version 0.42.0 darwin/arm64 (using go version go1.27.1 and LLVM version 22.1.4)
Detour; How to set up Zed for TinyGo
I fired up my current editor of choice - Zed - and faced an immediate error from gopls: could not import machine (no required module provides package "machine").
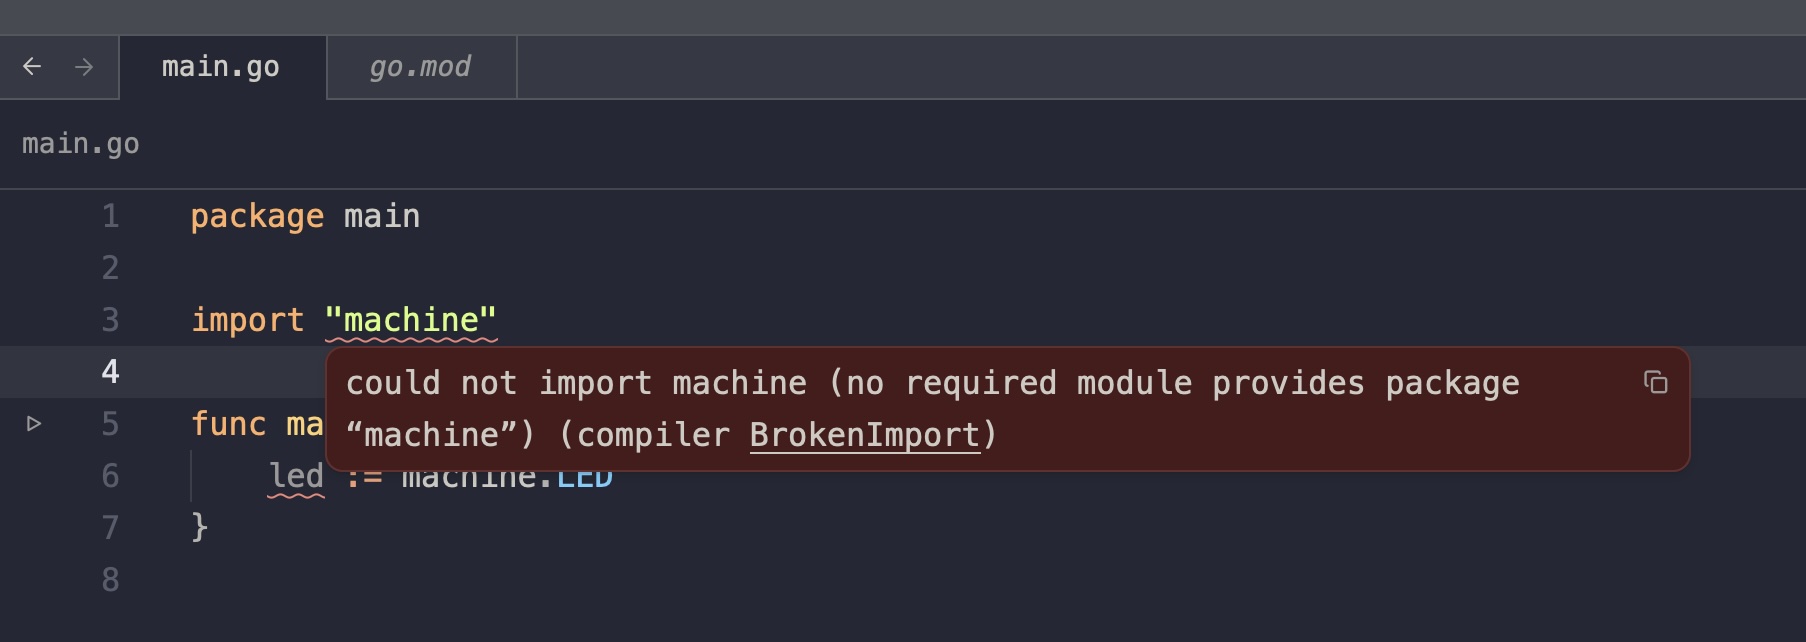
The reason is that machine is a package provided by TinyGo, and Zed’s gopls doesn’t know about it. But clearly TinyGo does know about it somehow, since it’s able to compile it… So just gotta make Zed’s gopls aware of it. The fix was really simple: Add .zed/settings.json file, and put the GOROOT and relevant build tags for TinyGo in it, so gopls picks them up. To find the params:
❯ tinygo info xiao-esp32c3
LLVM triple:       riscv32-unknown-none
GOOS:              linux
GOARCH:            arm
build tags:        tinygo.riscv baremetal linux arm tinygo.riscv32 esp32c3 esp espradio xiao_esp32c3 tinygo purego osusergo math_big_pure_go gc.conservative scheduler.tasks serial.usb tinygo.unicore
garbage collector: conservative
scheduler:         tasks
cached GOROOT:     /Users/shay/Library/Caches/tinygo/goroot-dbed4b0f656e7cd92119c0449034866ec8574a8a75d0b86b1f6c92d2c1b6a8a9
Then created this settings file:
{
  "lsp": {
    "gopls": {
      "binary": {
        "env": {
          "GOROOT": "/Users/shay/Library/Caches/tinygo/goroot-dbed4b0f656e7cd92119c0449034866ec8574a8a75d0b86b1f6c92d2c1b6a8a9",
          "GOFLAGS": "-tags=tinygo.riscv,baremetal,linux,arm,tinygo.riscv32,esp32c3,esp,espradio,xiao_esp32c3,tinygo,purego,osusergo,math_big_pure_go,gc.conservative,scheduler.tasks,serial.usb,tinygo.unicore"
        }
      }
    }
  }
}
EZ PZ! I wanted to get an LED blinking, but… I don’t have an LED. So let’s just flash some simple code on it and see that that code works. I looked at the machine package while I was at it, and landed with this:
package main

import (
	"fmt"
	"machine"
	"time"
)

func main() {
	count := 0
	freq := machine.CPUFrequency()
	for {
		fmt.Printf("%d: It's a-me!\n", count)
		n, err := machine.GetRNG()
		if err != nil {
			fmt.Printf("Error getting a random number: %v\n", err)
		}
		fmt.Printf("Random number: %d\n", n)
		fmt.Printf("CPU Frequency: %d Hz\n", freq)
		fmt.Printf("The time now is: %v\n", time.Now())
		time.Sleep(time.Second)
		count++
	}
}
Then, to flash the microcontroller and see the output:
❯ tinygo flash -target=xiao-esp32c3 -monitor .
Connecting to /dev/cu.usbmodem2101...
Connected.
Detected chip: ESP32-C3
USB-JTAG/Serial interface detected, disabling watchdogs
Loading stub loader...
Stub running.
Erasing flash...
[##################################################]  100.0%
Flash erased.
Attaching SPI flash...
Configuring flash size...
Auto-detected flash size: 4MB
Flash params set to 0x022F
SHA digest in image updated
Attaching SPI flash...
Switching to 460800 baud...
Running at 460800 baud.
Compressed 82400 bytes to 58782 (71%)
Flash begin: 58782 bytes at 0x00000000 (4 compressed blocks)
[##################################################]  100.0%
Flash complete. Verifying...
MD5 verified: 227e80c3a44d10edde2263258b1be26c

Device reset.
Connected to /dev/cu.usbmodem2101. Press Ctrl-C to exit.
1: It's a-me!
Random number: 3731196989
CPU Frequency: 160000000 Hz
The time now is: 1970-01-01 00:00:01.0005752 +0000 UTC m=+1.000575201
2: It's a-me!
Random number: 3267271047
CPU Frequency: 160000000 Hz
The time now is: 1970-01-01 00:00:02.000697 +0000 UTC m=+2.000697001
3: It's a-me!
Random number: 3000215343
CPU Frequency: 160000000 Hz
The time now is: 1970-01-01 00:00:03.0008043 +0000 UTC m=+3.000804301
4: It's a-me!
Random number: 3601292423
CPU Frequency: 160000000 Hz
The time now is: 1970-01-01 00:00:04.00089735 +0000 UTC m=+4.000897351
5: It's a-me!
Random number: 1807469129
CPU Frequency: 160000000 Hz
The time now is: 1970-01-01 00:00:05.000997625 +0000 UTC m=+5.000997626
6: It's a-me!
Random number: 1916848320
CPU Frequency: 160000000 Hz
The time now is: 1970-01-01 00:00:06.0010918 +0000 UTC m=+6.001091801

Cool. I was wondering how the chip would know what time is it without a RTC, turns out it doesn’t and it just resets to epoch on every flash.
3. Hello, Internet!
Let’s get this thing talking! I’d like to get a notification from the microcontroller to Telegram. I like doing automations with it and I actually use it as well. HOWEVER, Telegram APIs need HTTPS, which TinyGo’s espradio package does not support being a TLS client. So we will need to do some web developmet. A few things to get working here:
- Get a Telegram bot with an HTTPS API endpoint
- Set up a relay online from HTTP to HTTPS
- Get WiFi working on the microcontroller
- Set up the microcontroller to send notifications to the relay
So eventually it’ll look like this:
  graph TD
    Microcontroller -->|HTTP| Relay[Relay deployed to Koyeb]
    Relay -->|HTTPS| Telegram
    Telegram --> Shay
    Shay --> Plant
    Plant --> Tea
From an OpSec perspective, this setup is more secure, because the Bot Token doesn’t live on the IoT device which can be stolen and decomplied. On the other hand… It’s a plant monitoring device, who cares lol.
Relay deployed to Koyeb
Koyeb is an infrastructure provider. You can deploy stuff to it. I have a special place for them in my heart because they used to sponsor my podcast! Anyway, just a place you can run containers and other resources on the cloud.
The relay is very standard Go code, which isn’t worth reviewing here; just an http handler that parses some params, checks a simple secret, uses text/template to write the message, and then POSTs to Telegram. Quick test:
❯ curl 'http://localhost:8080/notify?plant=front-porch-mint&status=thirsty&secret=...'
ok
Ended up with:
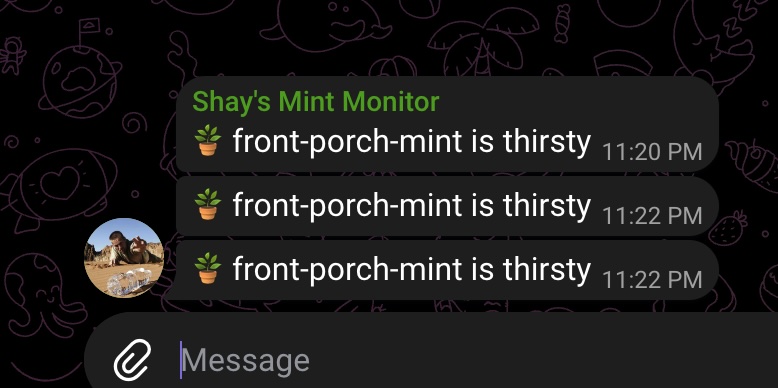
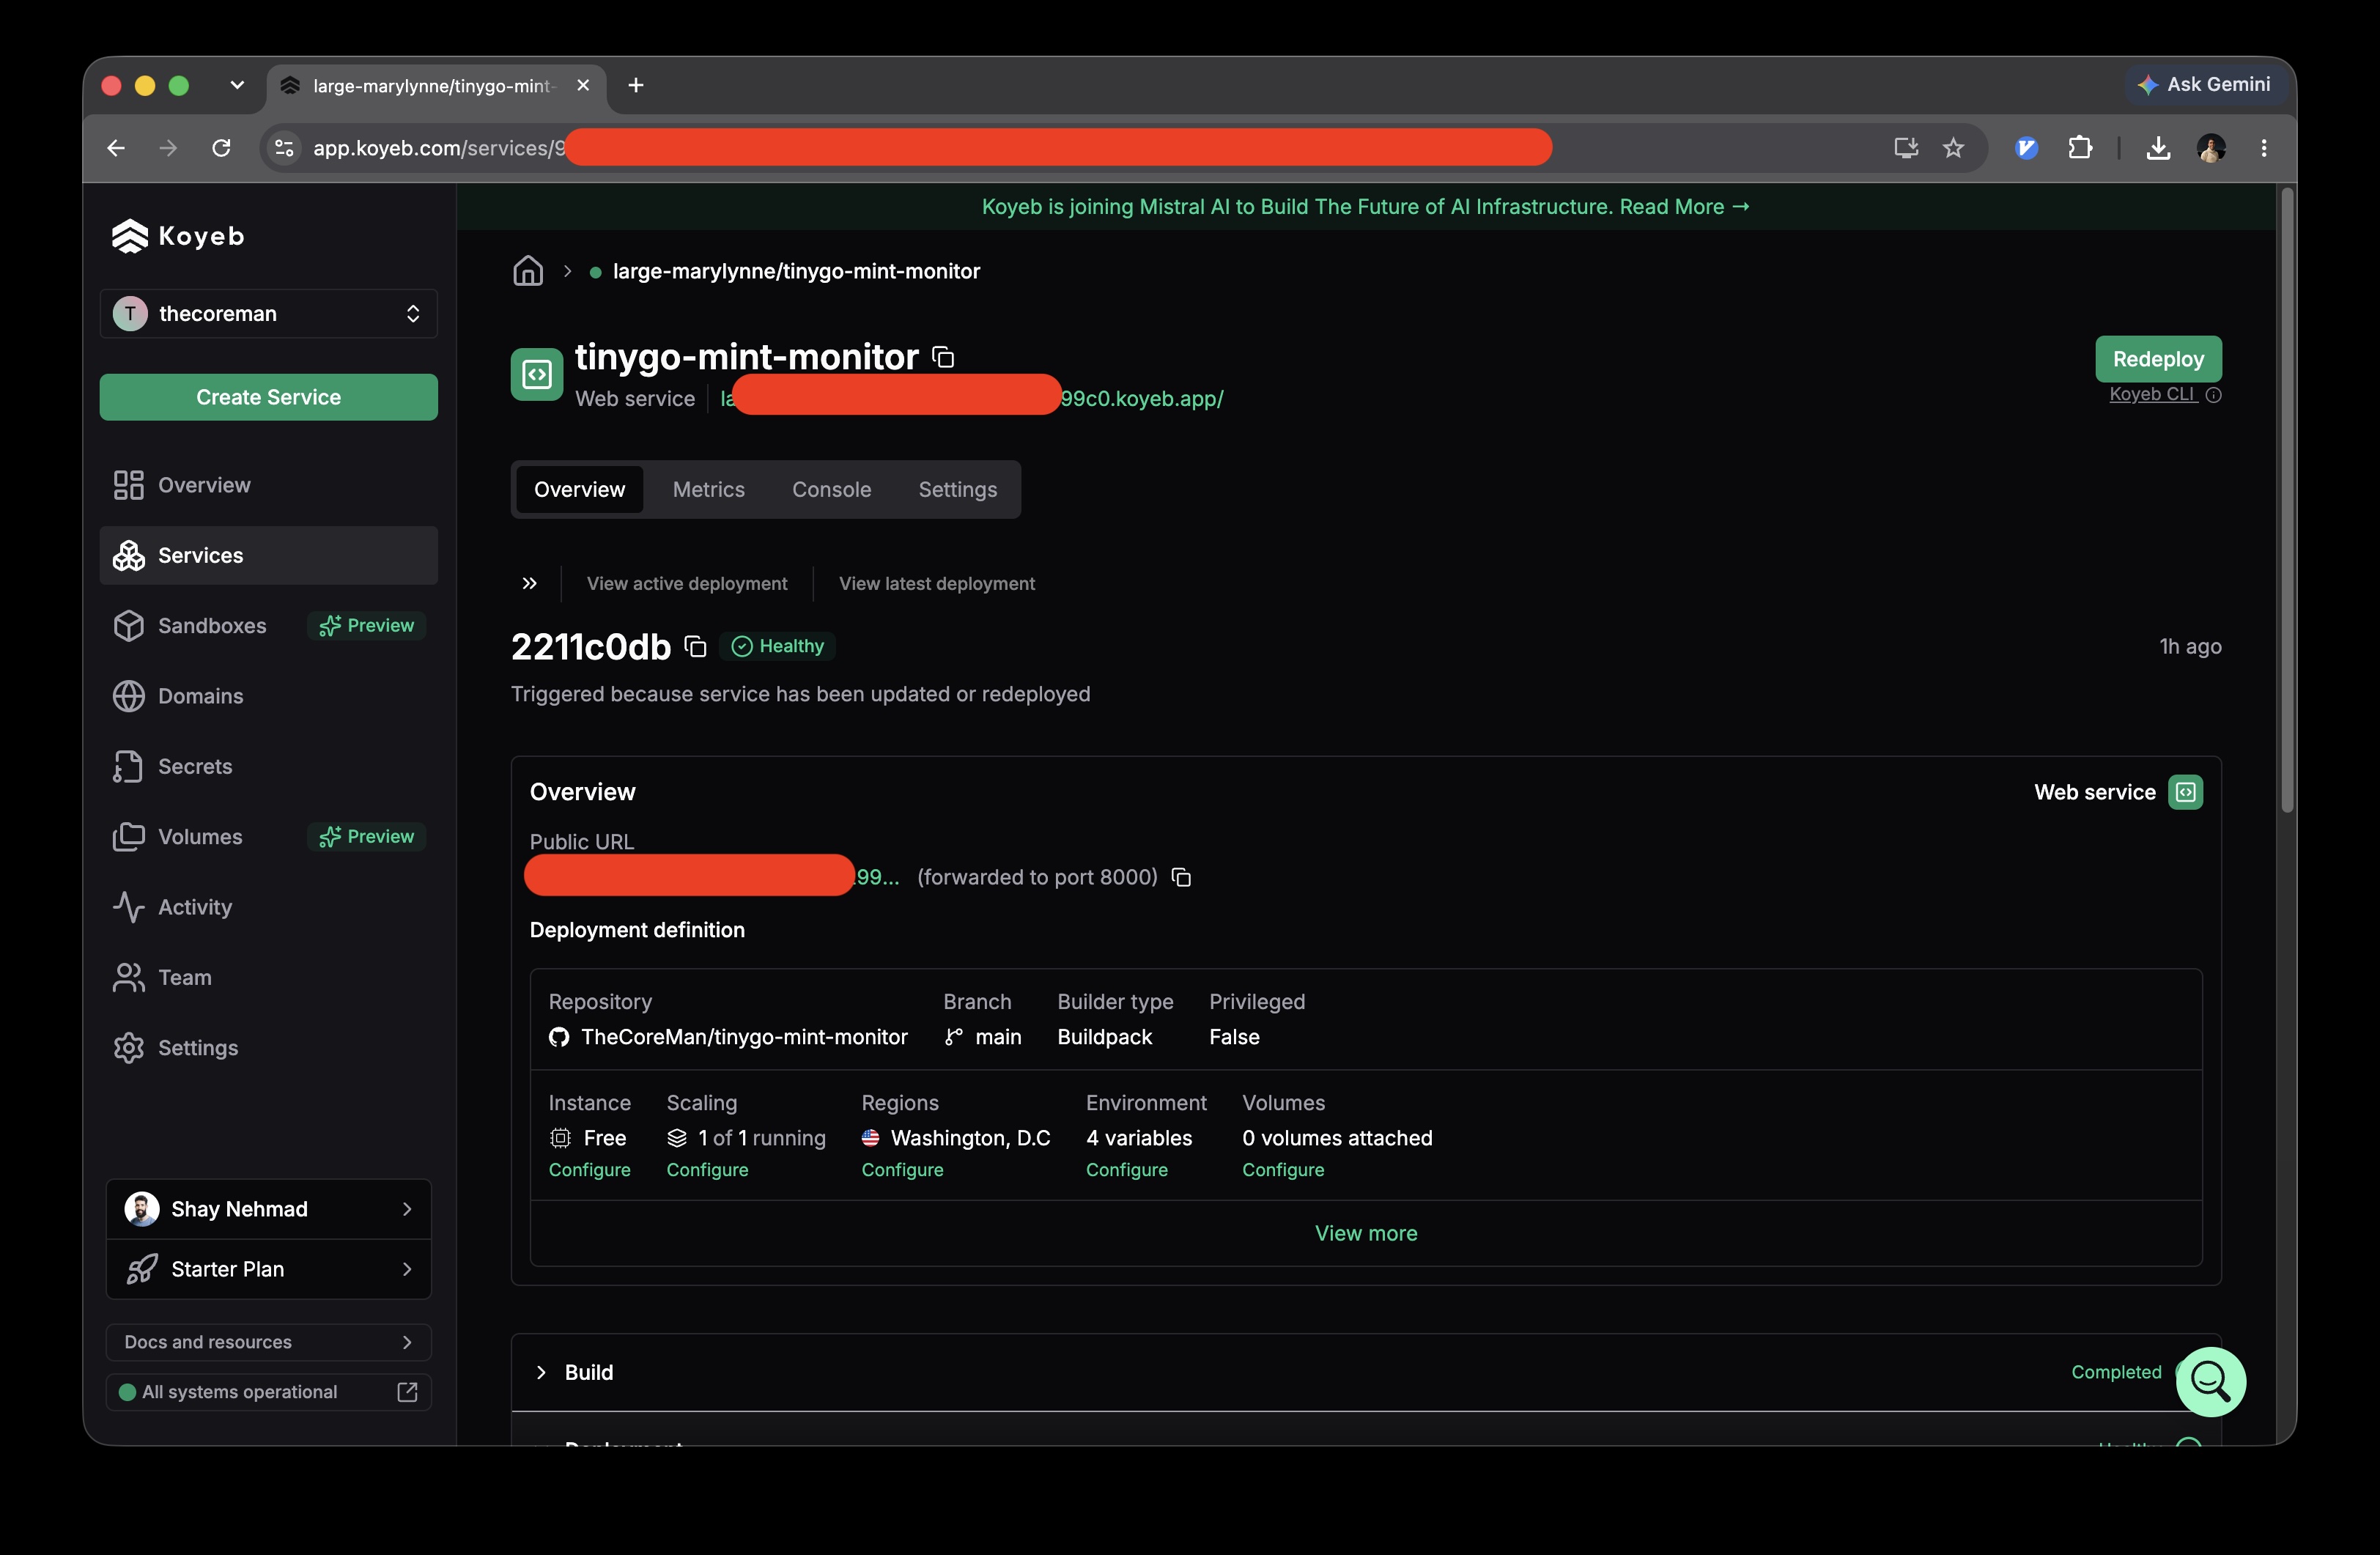
Now to deploy the relay. In Koyeb I skated by with using their free tier, and a simple Buildpack Go service:
And then, instead of testing against localhost, we can test against the Koyeb URL:
# Note: no `s` here!
#           |
❯ curl 'http://...-thecoreman-....koyeb.app/notify?plant=front-porch-mint&status=thirsty&secret=...'
ok
I didn’t finish setting up WiFi for the microcontroller, but jumped to a more hardware-y part, because my wife and daughter wanted to help out.
4. Soldering
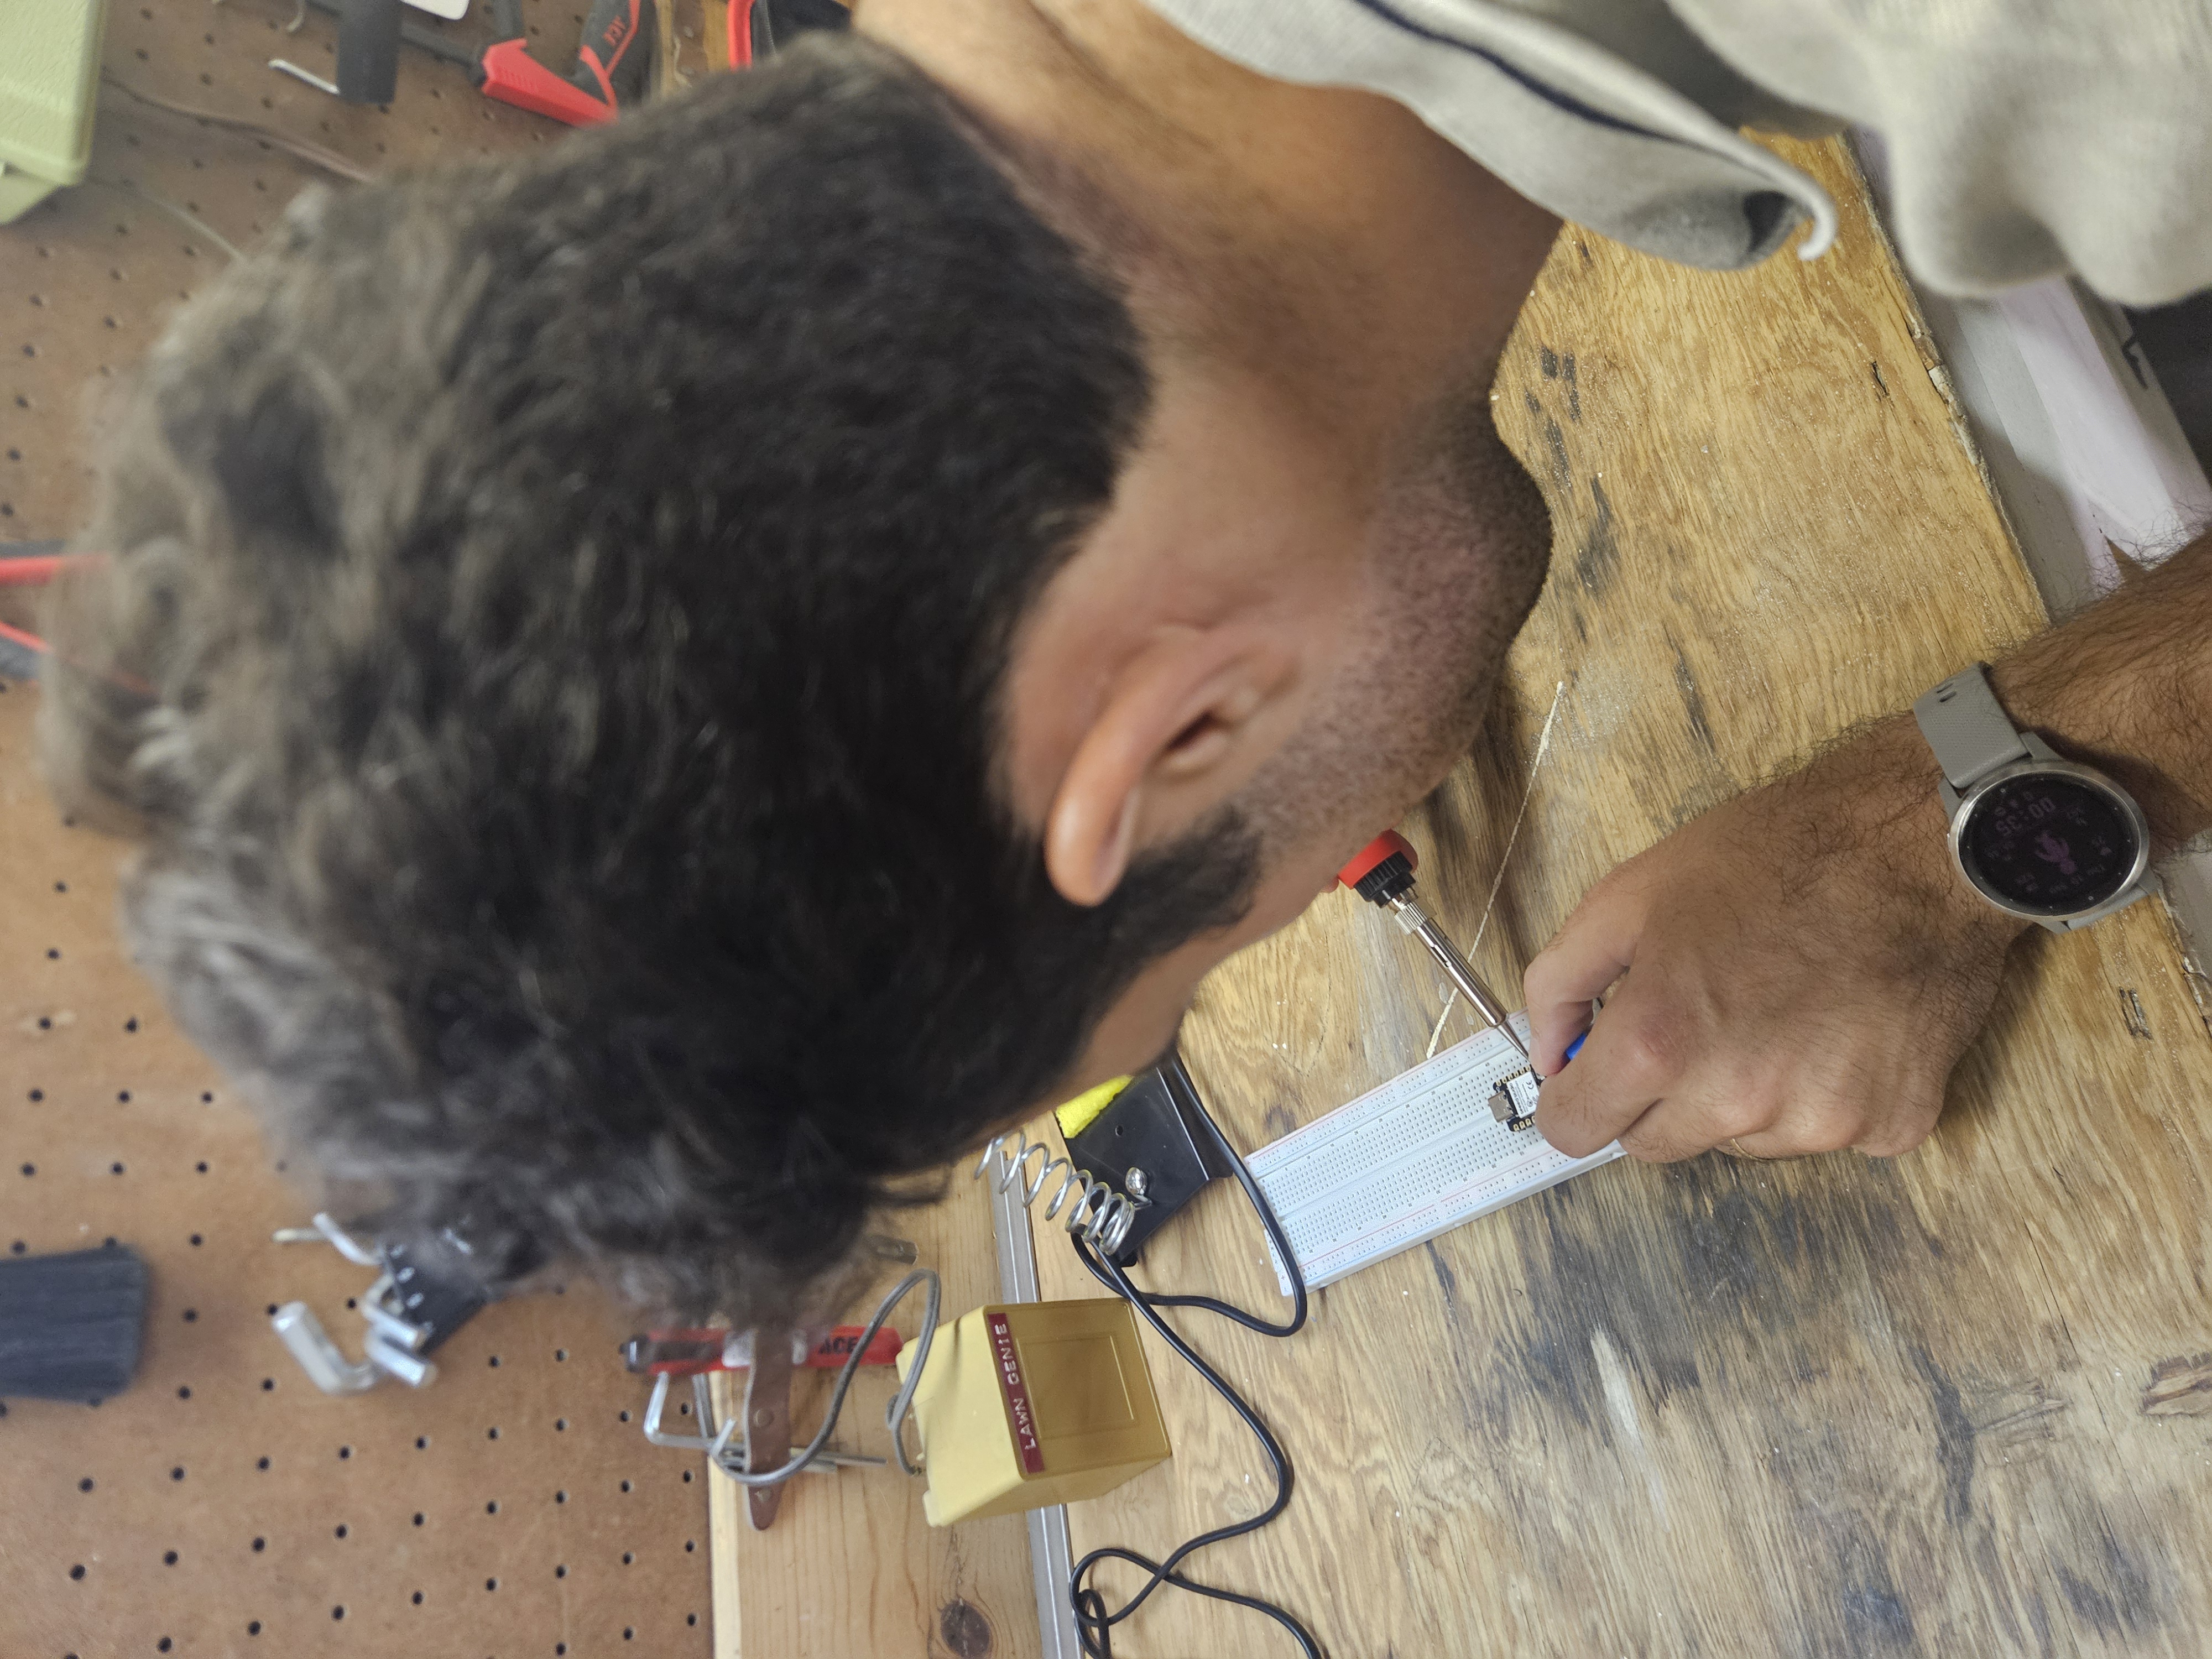
This part was fun! The microcontroller out the package is not soldered to its headers, so I had to solder them myself. Well, not totally myself; my beautiful wife, Olga, helped out.

Luckily, the kit that I got had a book reminding me how to solder well: “Mastering the Art of Soldering”.
Simple as:
- Build the stand
- Go someplace ventilated where you can work (our garage)
- Wet the sponge, prep the solder
- Heat the soldering iron to 340°C
- Place the headers on the breadboard and the microcontroller on top of the (breadboard is just a jig)
- Solder two opposite corners
- Check alignment
- Solder all the rest of the pins
- …Have your wife make your solders look nicer
- Test that it all still works
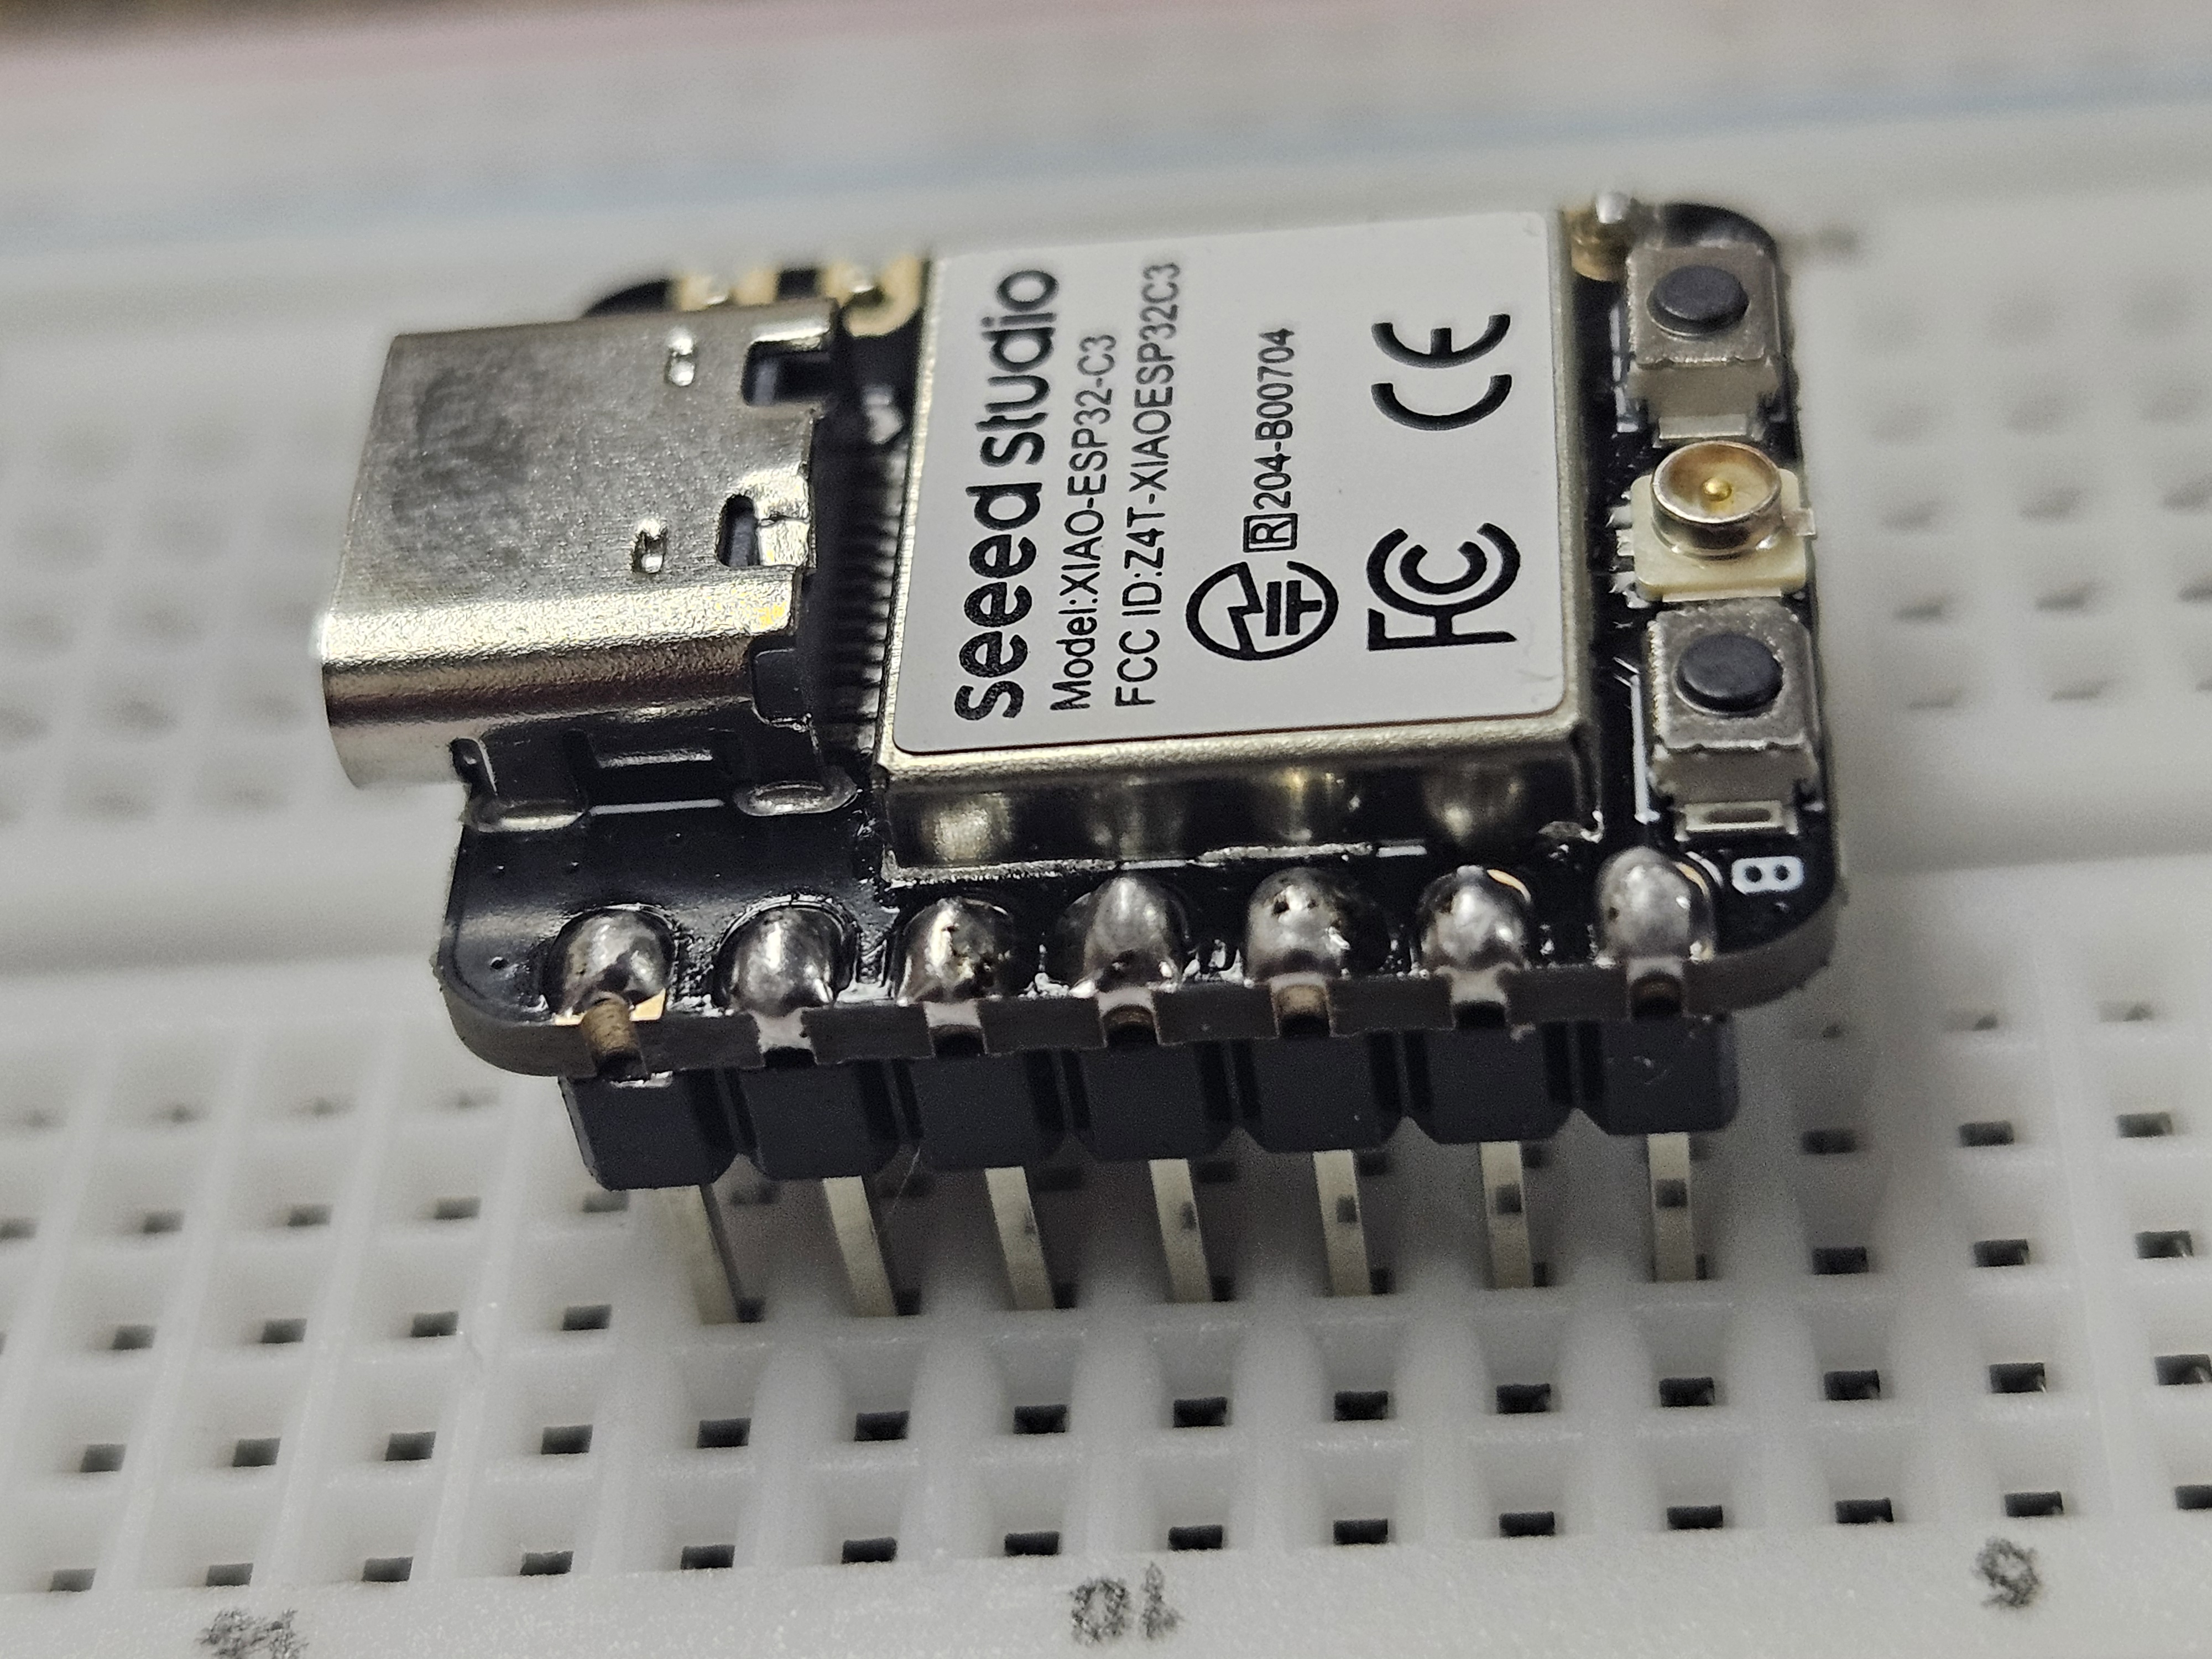
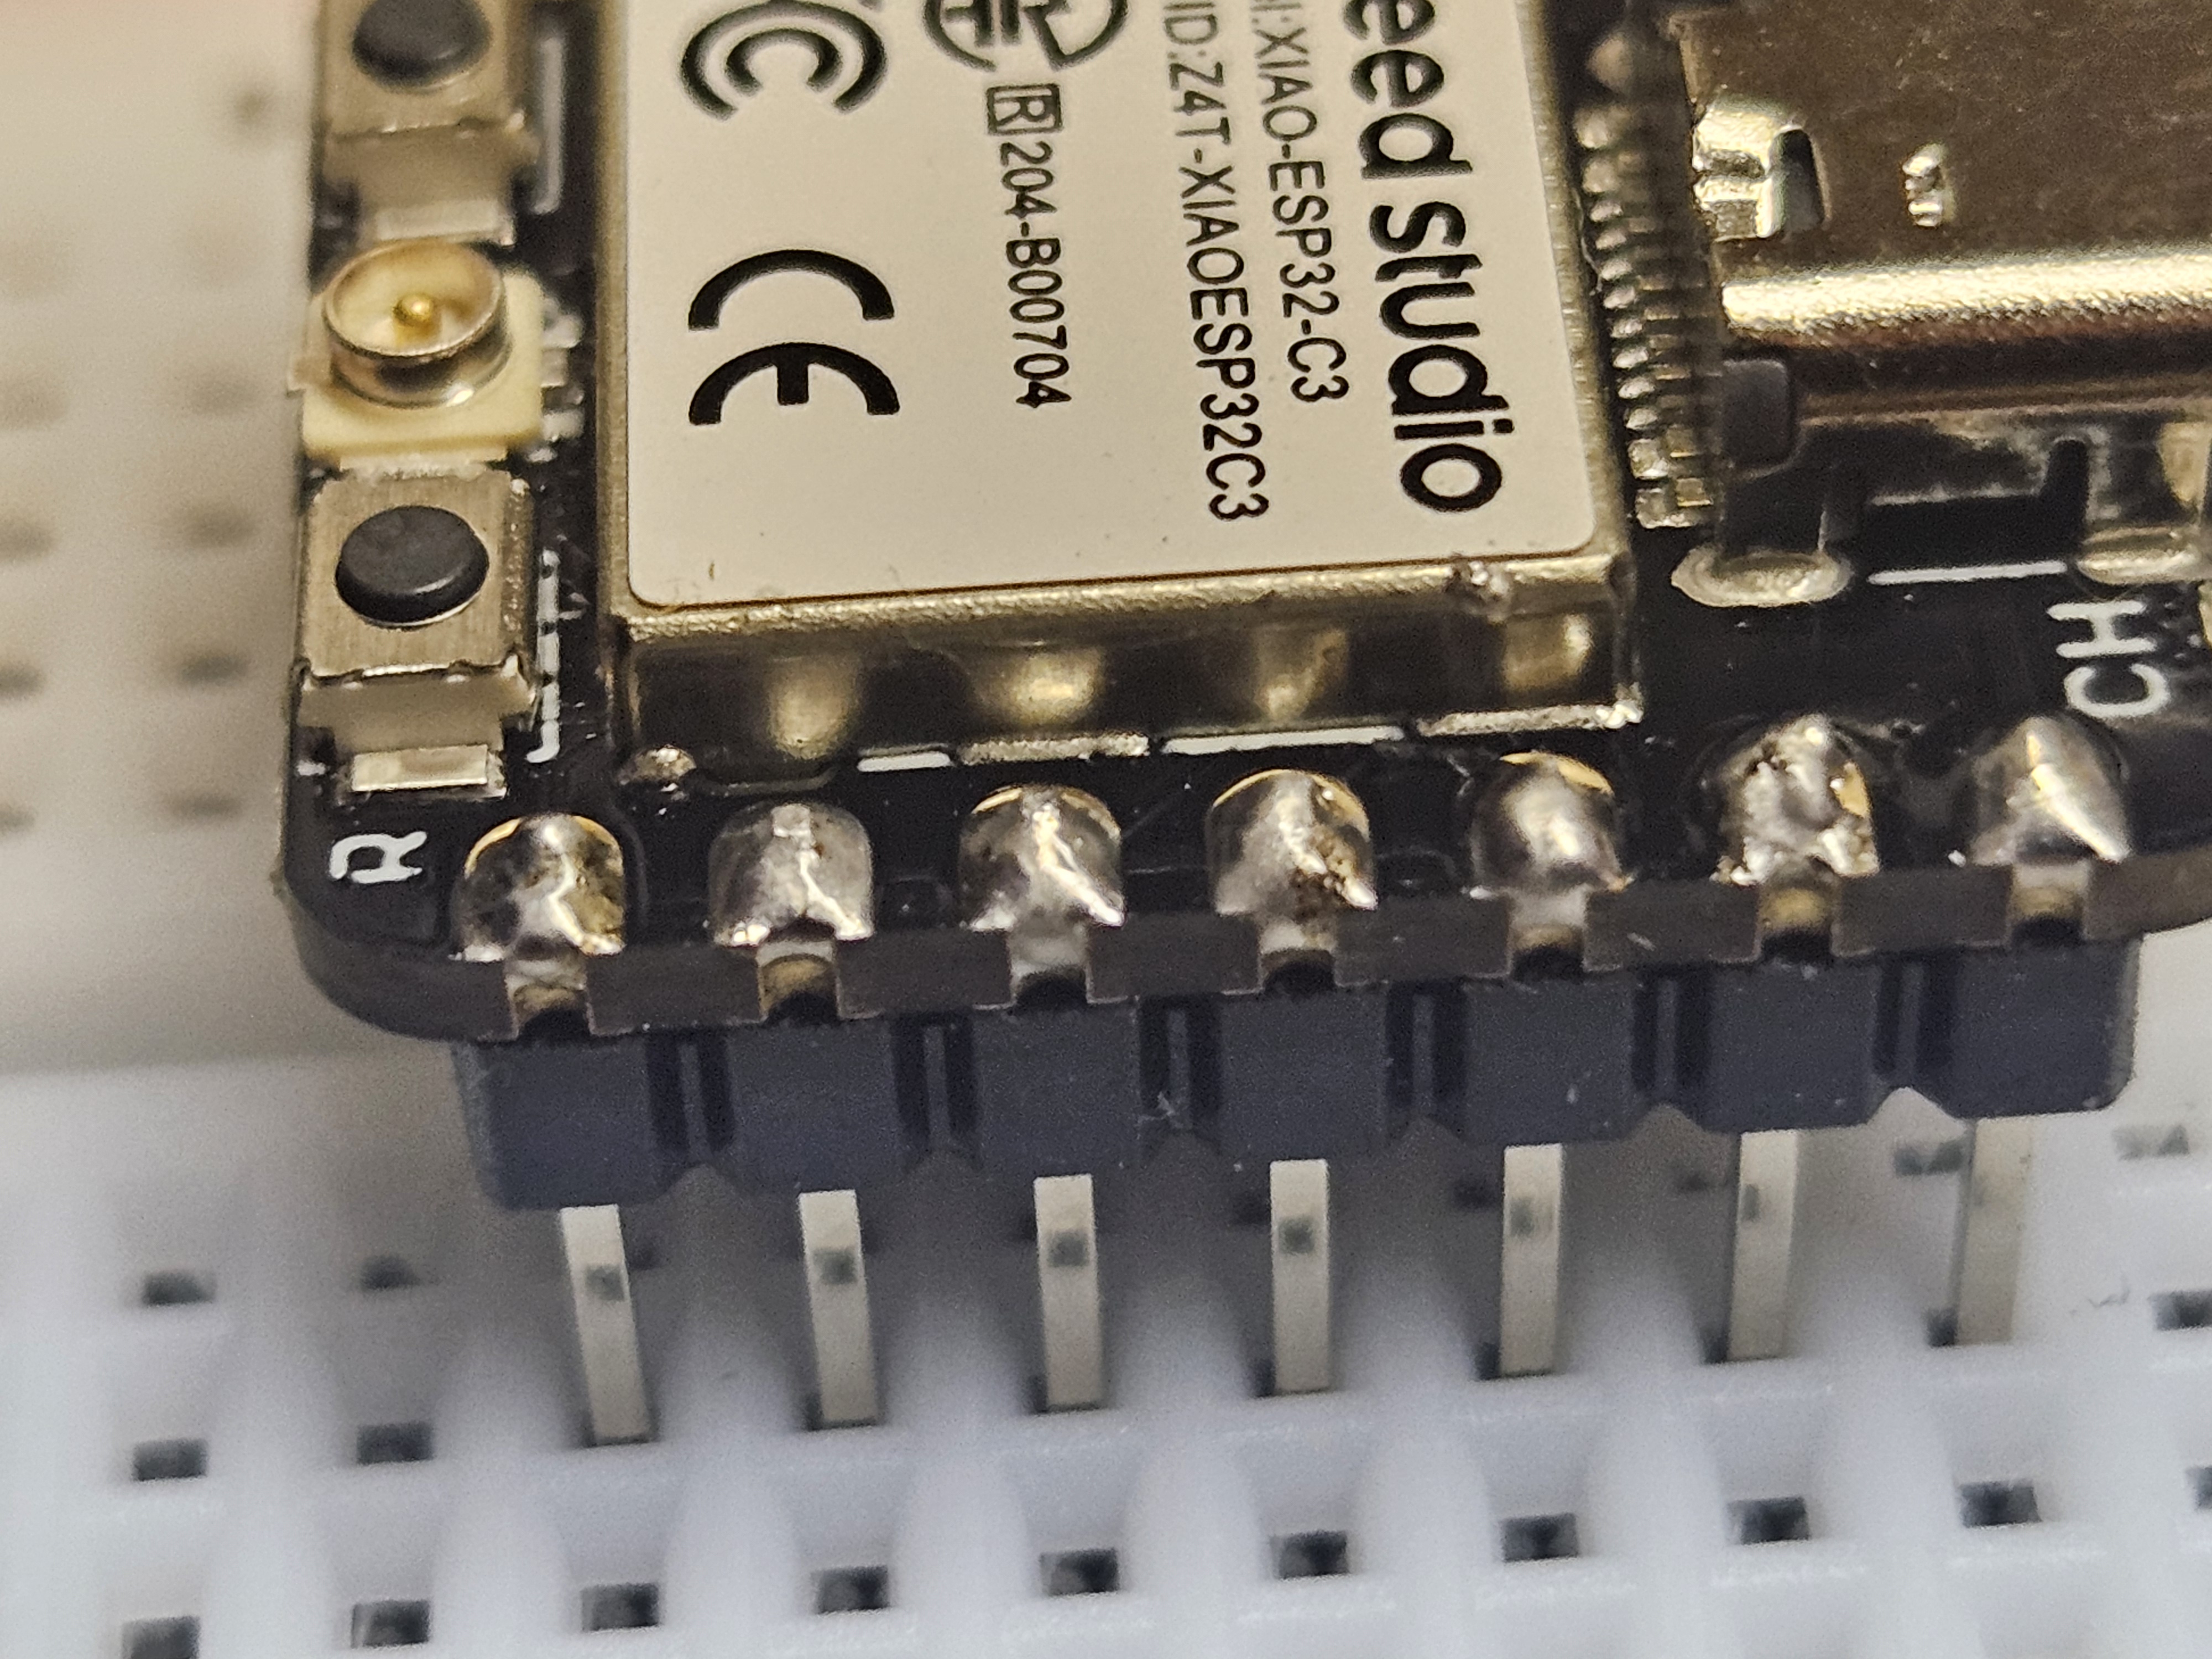
Then let it cool down and tested that it still works:
5. Connecting the moisture sensor
The moisture sensor is a simple analog sensor. It has three connectors:
- GND: Ground
- VCC: Power
- AOUT: Analog output
To figure out how to connect it to the microcontroller, I had to finally learn how a breadboard works. Watched this highly informative YouTube video:
And then looking at the schematic of the XIAO pins from Seeed Studio’s website:
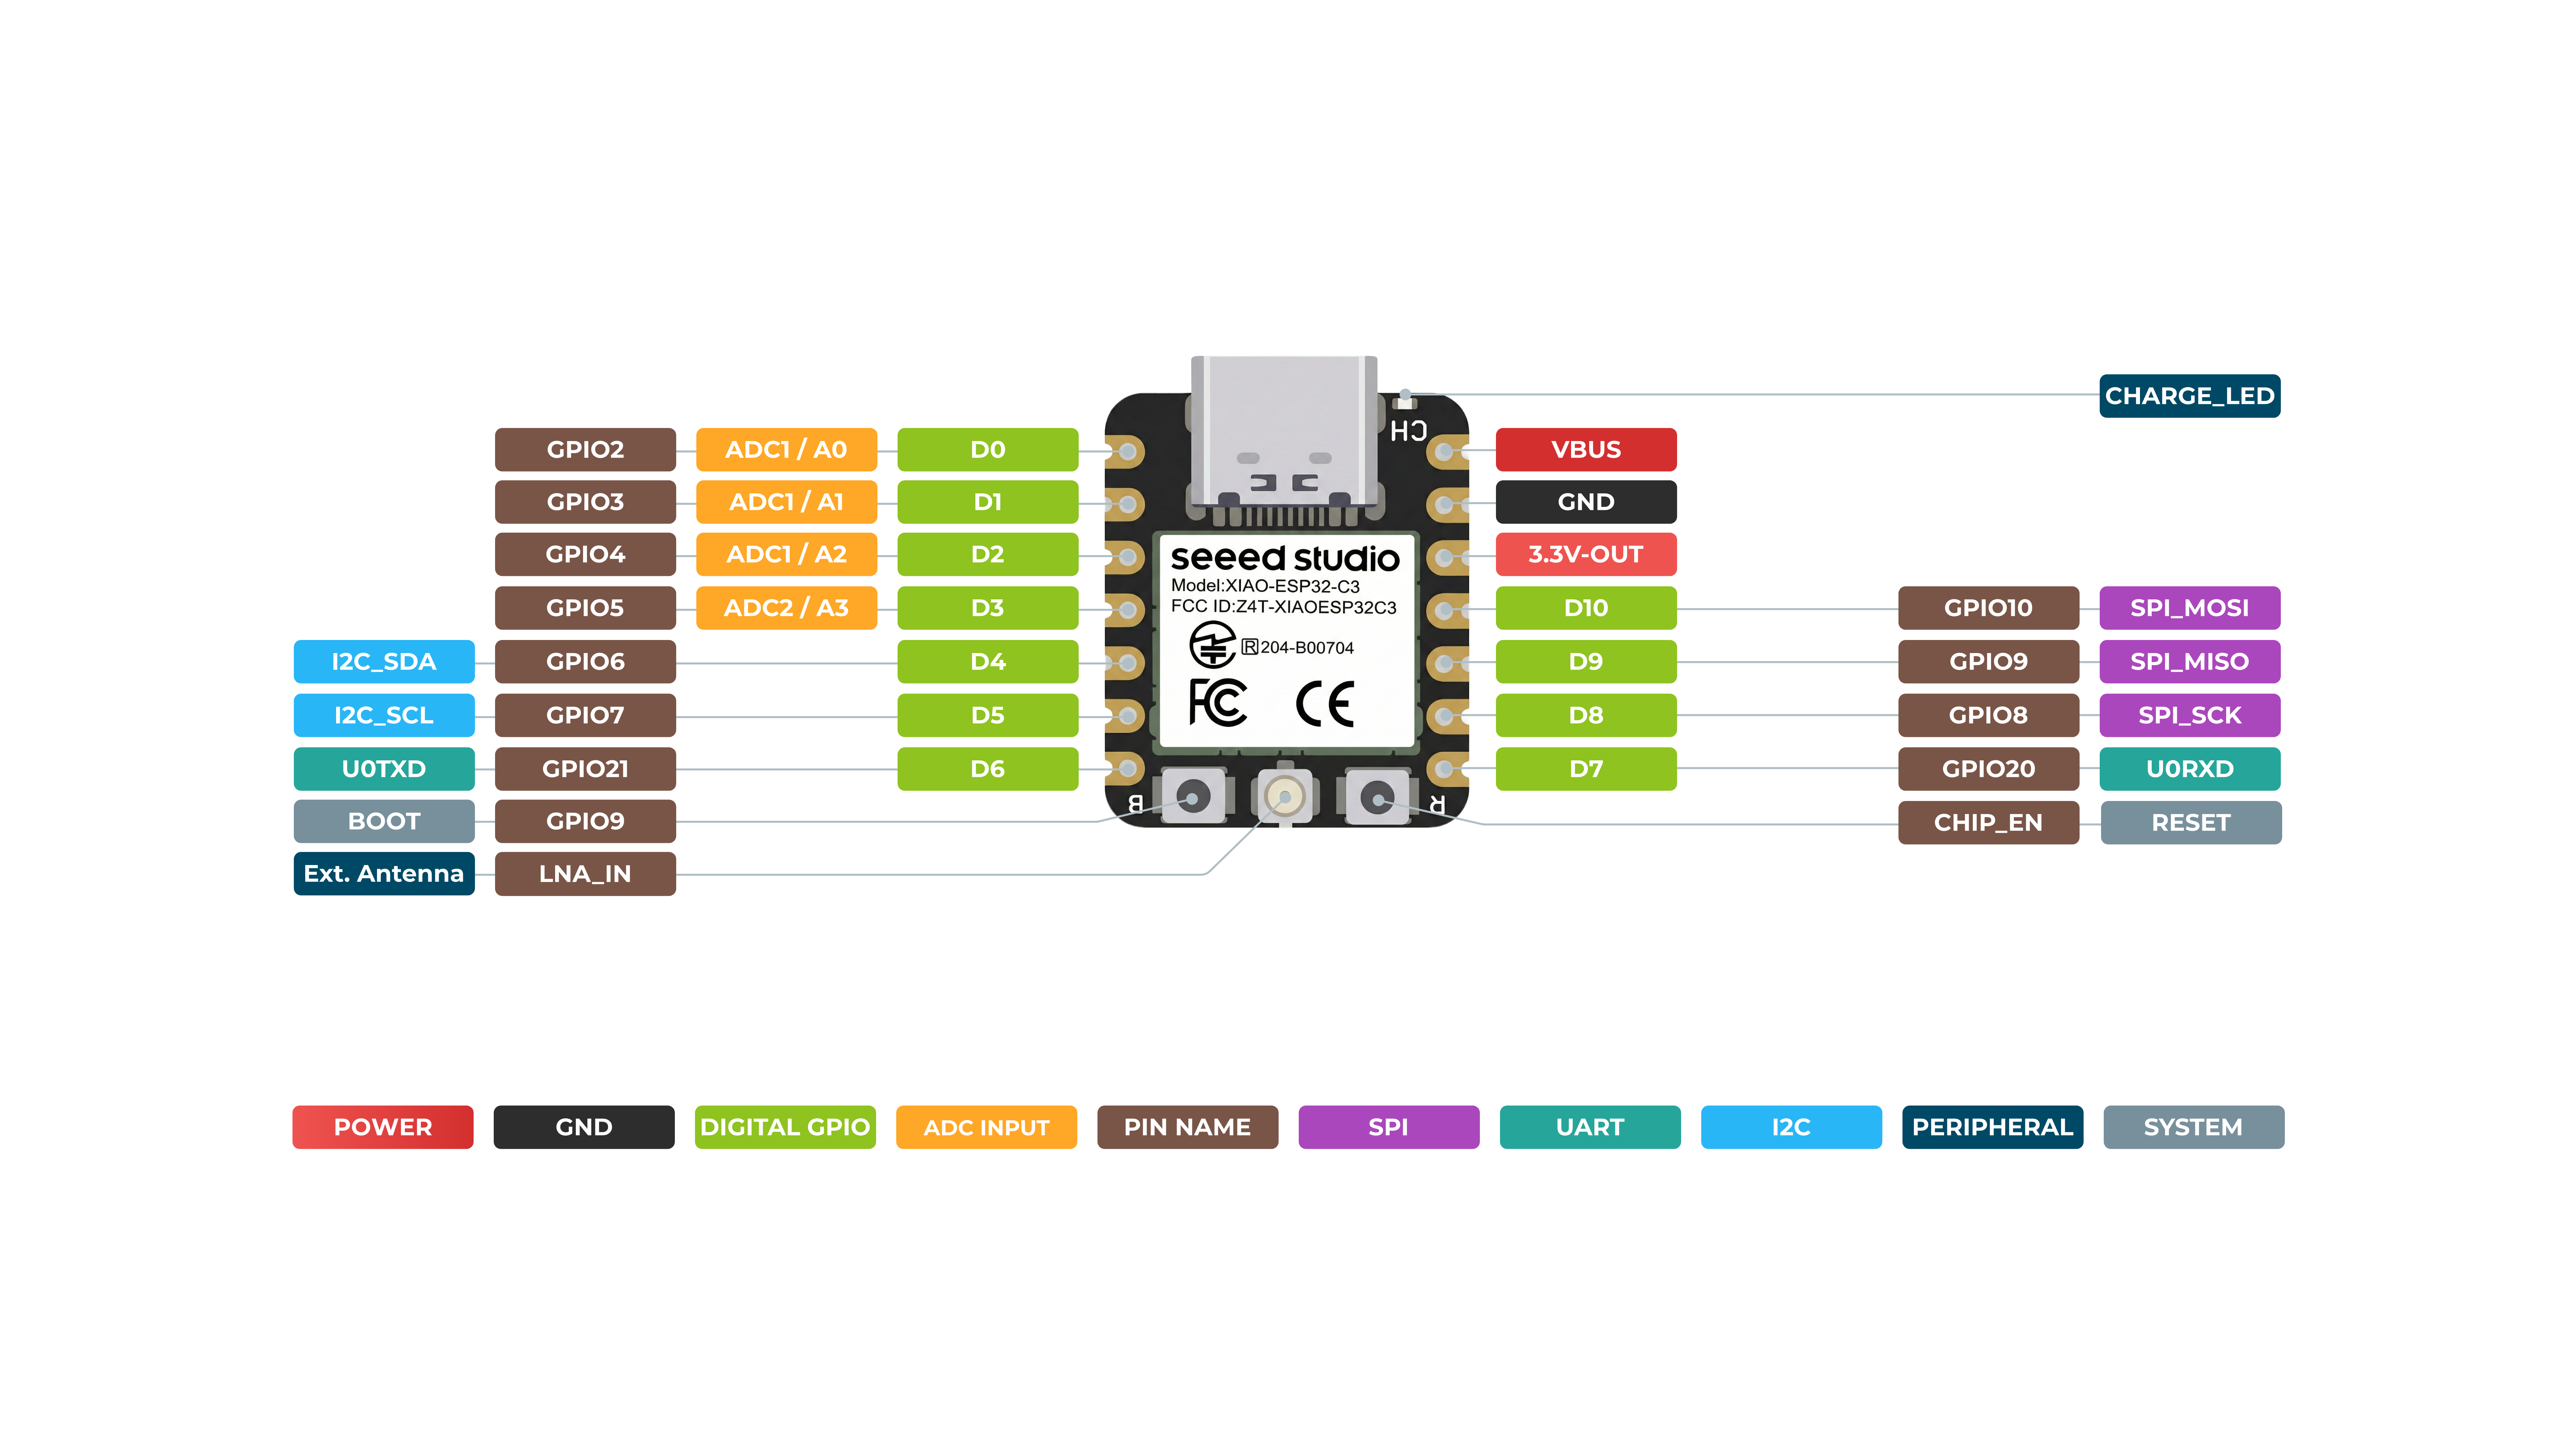
And matching them up:
| Sensor Pin | Sensor cable color | XIAO Pin |
|---|---|---|
| GND | Black | GND, right side, 2nd pin |
| VCC | Red | 3.3V-OUT, right side, 3rd pin |
| AOUT | Yellow | D1 / A1 / ADC1, left side, 2nd pin |
With the breadboard, this is simple enough that I did this with my 5 year old. Great fun!
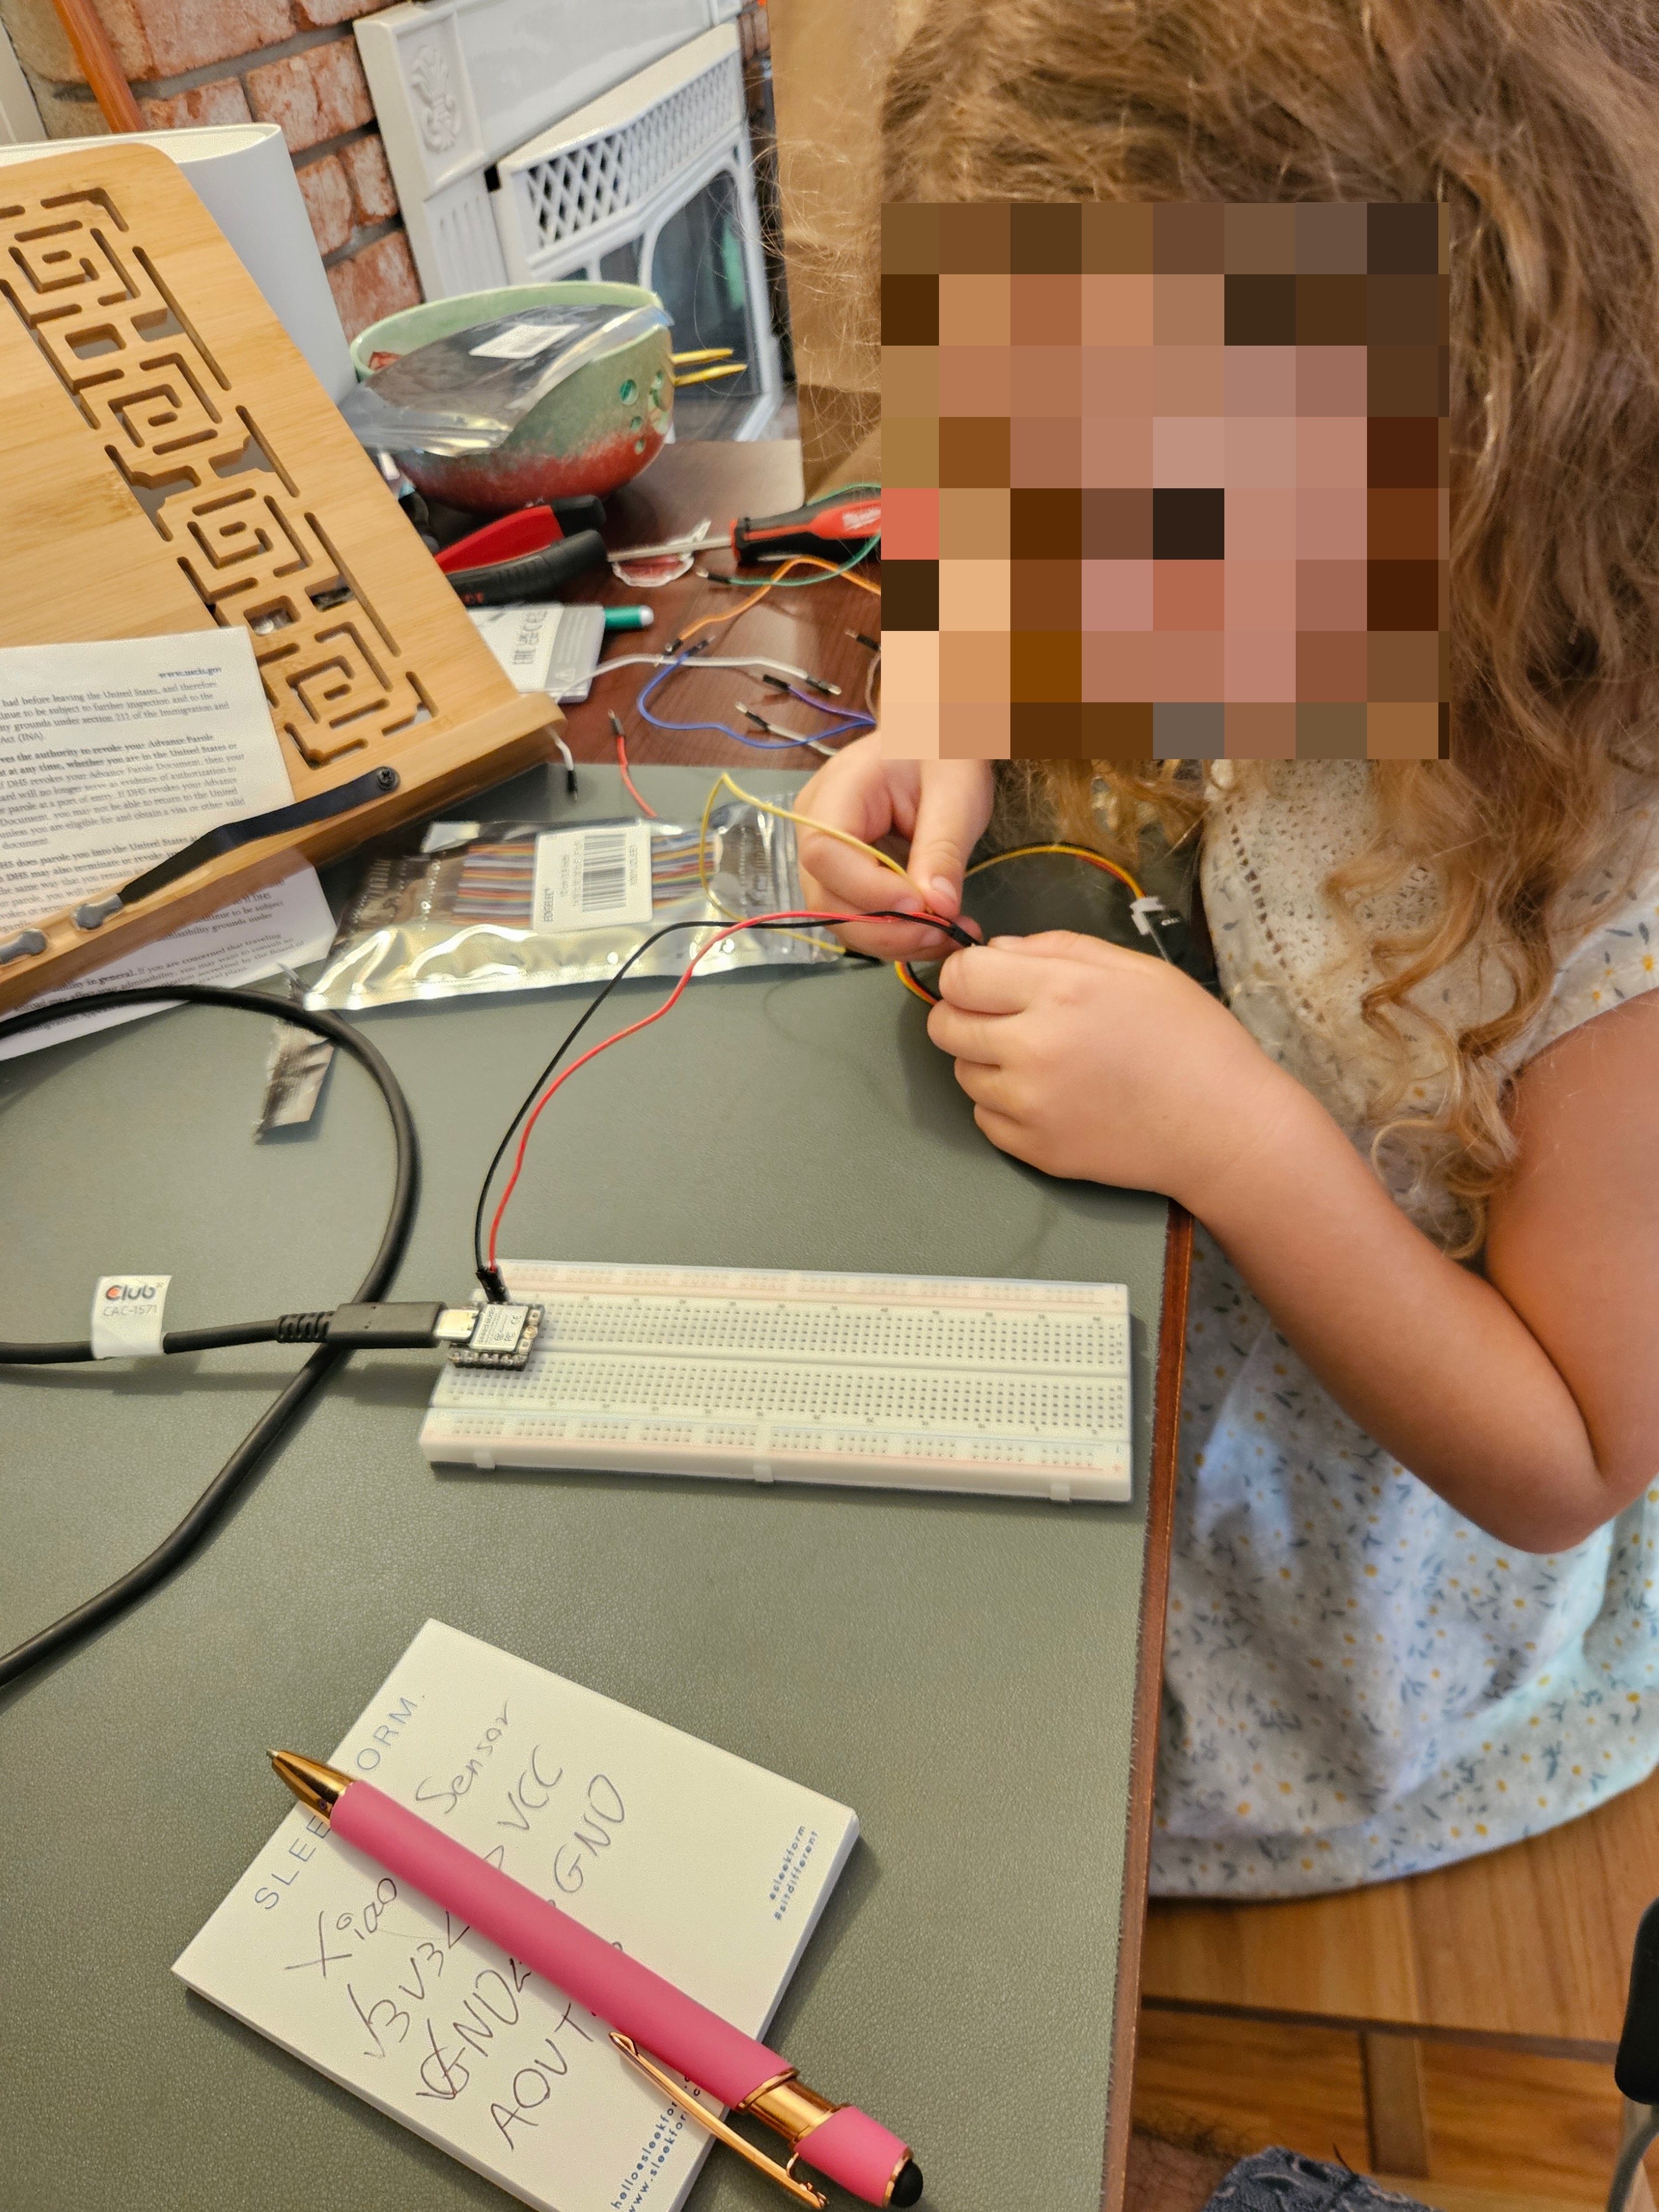
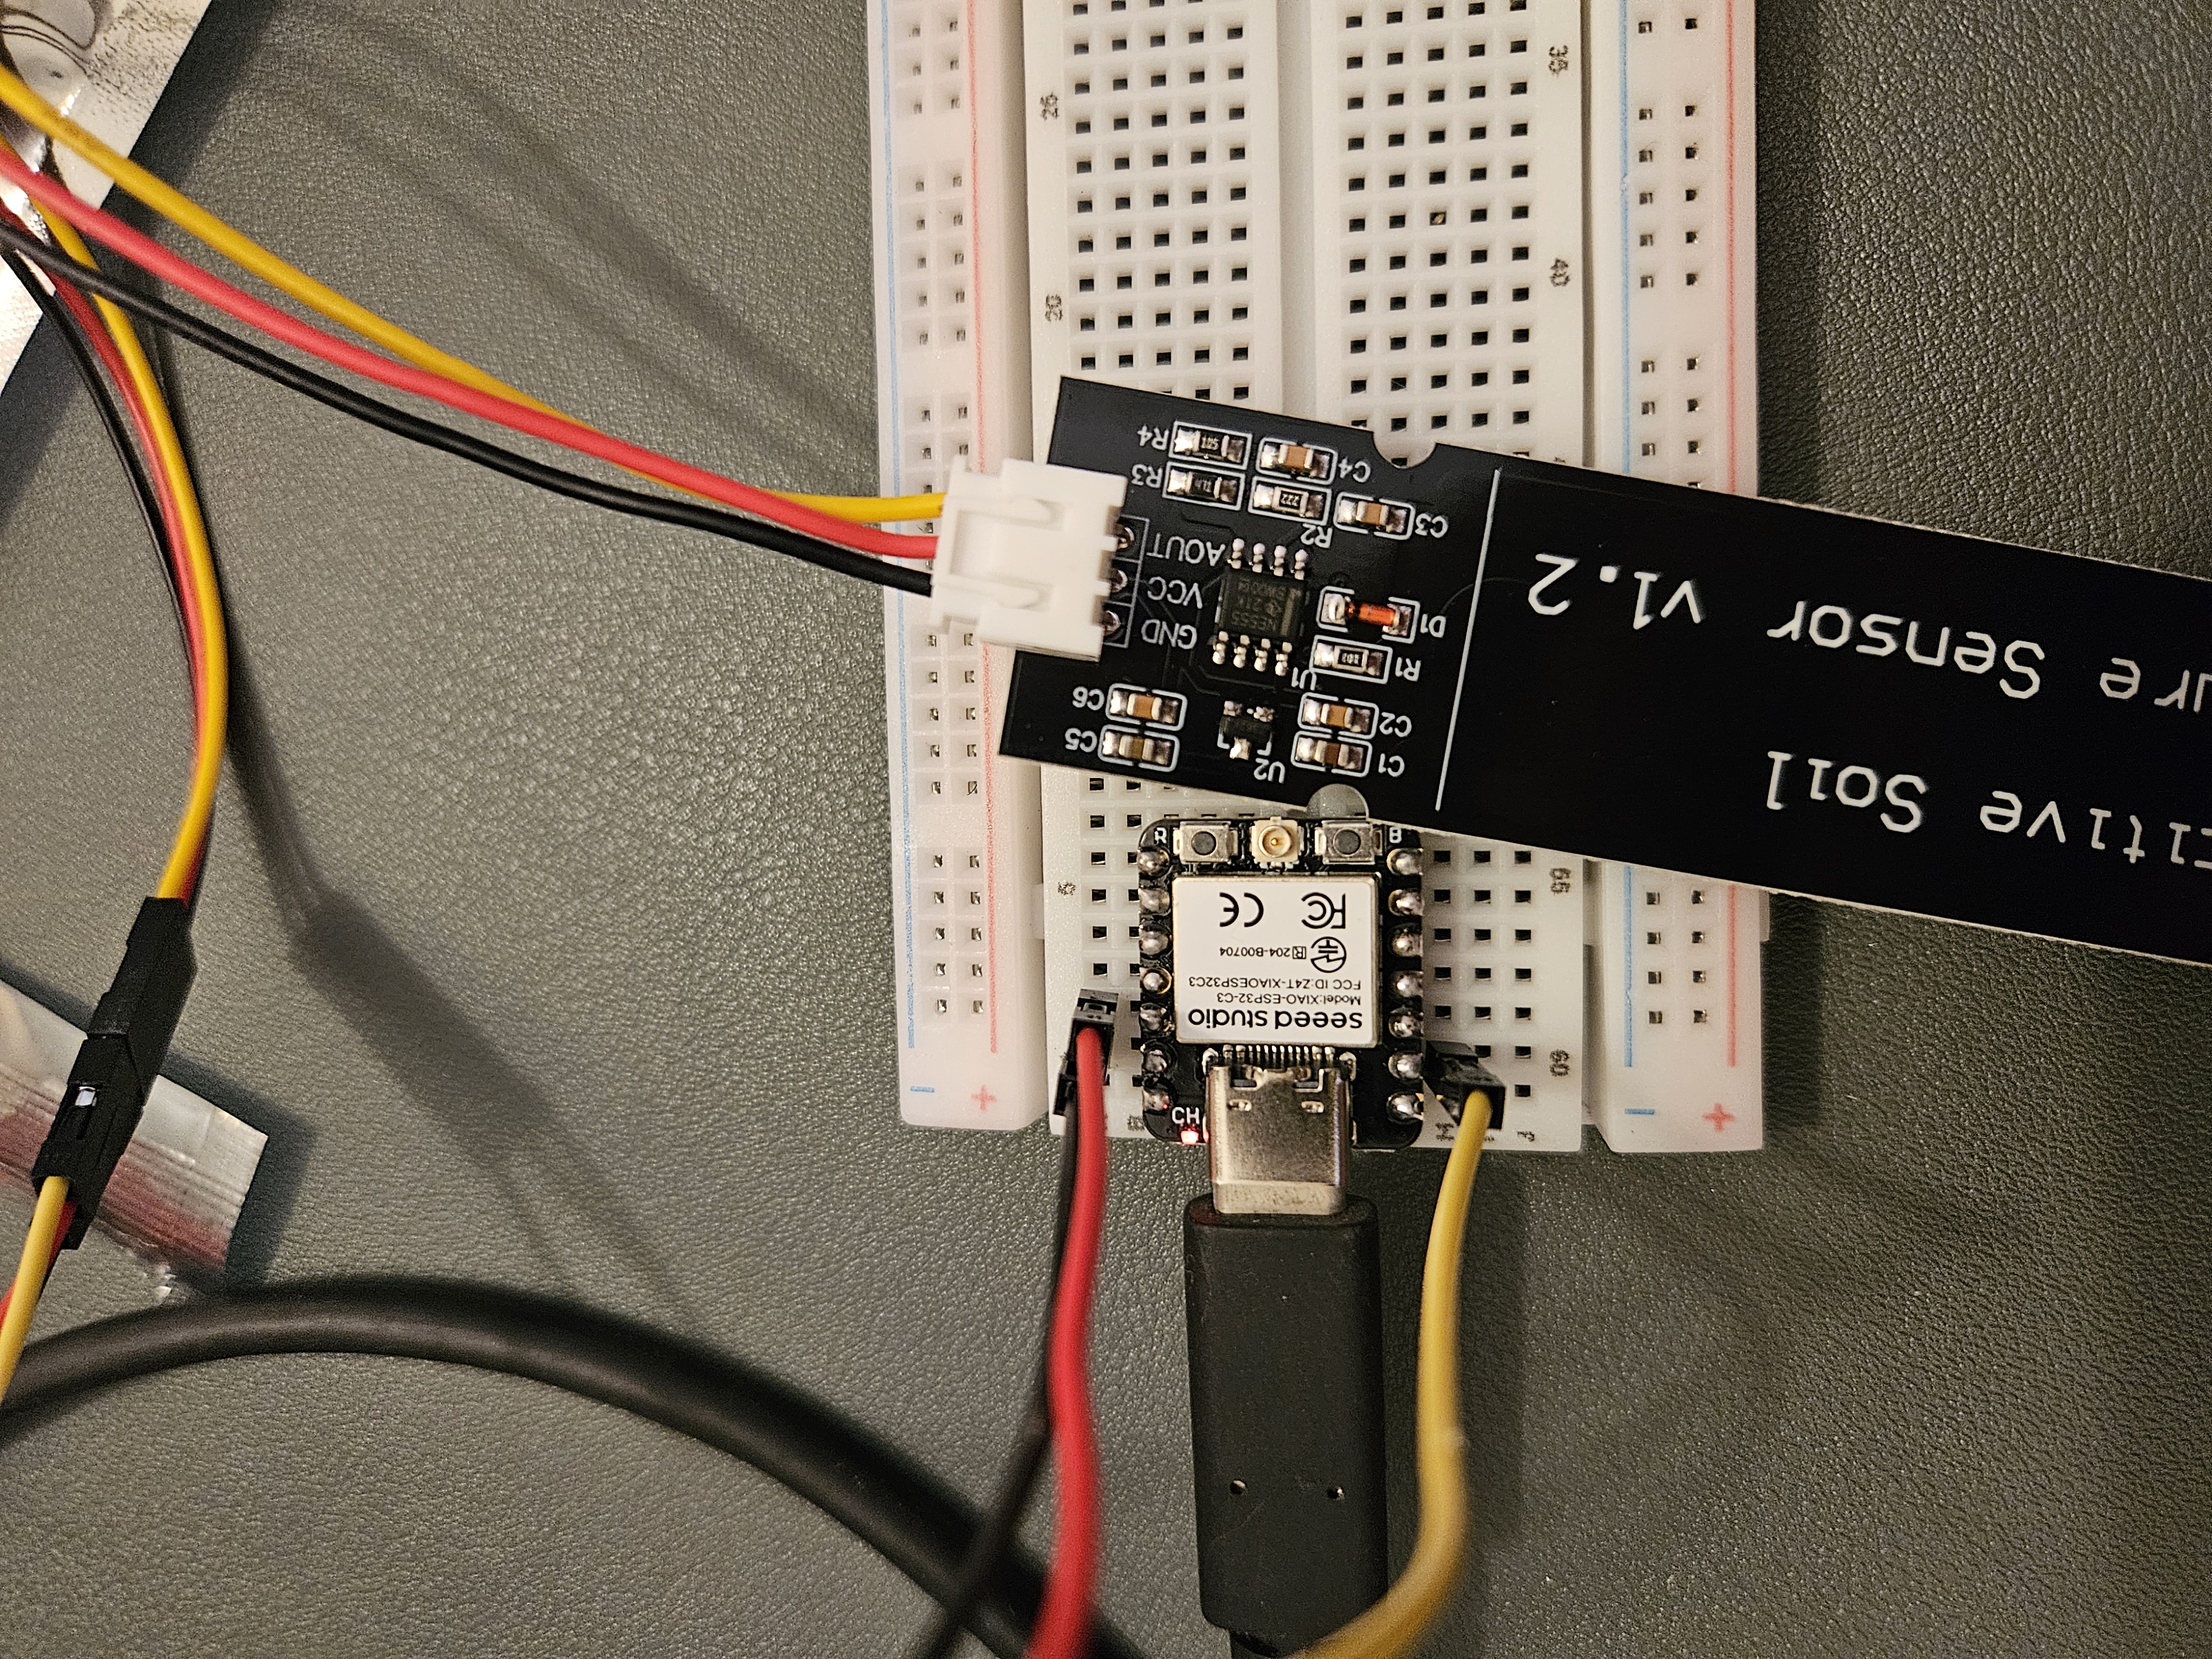
To test it, flashed some new code onto the XIAO:
package main

import (
	"fmt"
	"machine"
	"time"
)

func main() {
	count := 0

	sensor := machine.ADC{Pin: machine.A1}
	sensor.Configure(machine.ADCConfig{})

	for {
		moistureValue := sensor.Get()
		fmt.Printf("#%d:\tMoisture value: %d\n", count, moistureValue)
		time.Sleep(time.Second)
		count++
	}
}
And it worked: when running it, getting these readings:
❯ tinygo flash -target=xiao-esp32c3 -monitor .
Connecting to /dev/cu.usbmodem2101...
Connected.
Detected chip: ESP32-C3
USB-JTAG/Serial interface detected, disabling watchdogs
Loading stub loader...
Stub running.
Erasing flash...
[##################################################]  100.0%
Flash erased.
Attaching SPI flash...
Configuring flash size...
Auto-detected flash size: 4MB
Flash params set to 0x022F
SHA digest in image updated
Attaching SPI flash...
Switching to 460800 baud...
Running at 460800 baud.
Compressed 64688 bytes to 46813 (72%)
Flash begin: 46813 bytes at 0x00000000 (3 compressed blocks)
[##################################################]  100.0%
Flash complete. Verifying...
MD5 verified: fbffcf08e8e628610c9844aec6b87838

Device reset.
Connected to /dev/cu.usbmodem2101. Press Ctrl-C to exit.
#1:	Moisture value: 45680
#2:	Moisture value: 45712
#3:	Moisture value: 45232
#4:	Moisture value: 45712
#5:	Moisture value: 45952
#6:	Moisture value: 45280
#7:	Moisture value: 45808
#8:	Moisture value: 46048
#9:	Moisture value: 45744
#10:	Moisture value: 45520
#11:	Moisture value: 46272
#12:	Moisture value: 46448
#13:	Moisture value: 46736
#14:	Moisture value: 46976
#15:	Moisture value: 47520
#16:	Moisture value: 47856
#17:	Moisture value: 45232
#18:	Moisture value: 44960
#19:	Moisture value: 44992
#20:	Moisture value: 43984
#21:	Moisture value: 44928
#22:	Moisture value: 45184
#23:	Moisture value: 45280
#24:	Moisture value: 45280
#25:	Moisture value: 45536
#26:	Moisture value: 45728
#27:	Moisture value: 45984
#28:	Moisture value: 46304
#29:	Moisture value: 46464
#30:	Moisture value: 46064
#31:	Moisture value: 65520
#32:	Moisture value: 65520
#33:	Moisture value: 65520
#34:	Moisture value: 65520
#35:	Moisture value: 65520
#36:	Moisture value: 65520
So, 65520 is the value when the sensor was just hanging out on the table, and the 40K-ish values are when holding it with wet hands.
An interview with Ron Evans of TinyGo
This was what I managed to get done in about two sessions of working on this. Next up would be connecting the XIAO to the WiFi, putting it together with a battery, and “deploying” it.
But, before I managed to do that, we had an interview with Ron Evans of TinyGo, which is the whole reason I started this project to begin with!

Watch the interview with Ron Evans on YouTube, or listen to the podcast episode, Cup o’ Go E172: A Big Episode About Tiny Things.
Hopefully I’ll find some time over the weekend to wrap this up and publish a part two.